Tuesday, September 8, 2009

Awesome new 3d chocolate Christmas tree mould


I am floored by the quality of the new range of Xmas moulds I've just received. Each comes with an instructional "how to" card, making the mould itself, perfect for gift giving. One of my personal favourites is the 3d Xmas tree I am going to try making one of these with the children this Xmas.

Click here for our full chocolate mould range

I saved my favourite impression mat until last!


I just adore what Autumn Carpenter has done with the Paisley impression mat and matching accent moulds. Click here to buy Paisley items


Bright Paisely Tiered Cake


Tools and Ingredients
6", 8" and 10" cakes
3 1/2 lbs. blue fondant
2 lbs. yellow fondant
1 lb. pink fondant
orange food spray
green food spray
royal icing
paisley accessory mould
14" cake drum
paisley texture sheet
yellow food coloring
blue food colouring
orange food colouring
pink food colouring
green food colouring
Cover 6" cake with pink fondant, 8" cake with yellow fondant and 10" cake with blue fondant. Roll out remaining blue fondant to a 14" circle. Place texture sheet on top of fondant and roll over once with rolling pin, applying heavy, even pressure. Spread thin layer of buttercream or piping gel on cake drum. Carefully lift fondant onto drum and trim around edge. Place ribbon around edge of drum if desired. Stack cakes using your preferred method. Place cake on turntable (if available). Spray orange food spray where 6" cake meets 8" cake and slowly rotate the cake. Blend color by spraying lightly above and below. Repeat the same process for green food spray between 8" and 10" tiers. Mix royal icing according to recipe or package instructions. Thin slightly by adding extra water. Use food colouring to create 5 different colours and put each in parchment cone. Knead together small amount of blue and yellow fondant to make green and yellow and pink to make orange. Spray paisley accessory mold lightly with cooking spray and wipe out excess with paper towel. Push small amount of coloured fondant into mould and scrape off any excess. Remove piece from mould by gently prying up edge with straight pin. Attach to cake with small amount of royal icing. Repeat using different colours until entire cake is covered. Pipe small dots and details in assorted colours around edge and on top of each moulded paisley.


Paisley Chocolate Wrap Cake


Tools and Ingredients
8” cake (suggestion: 3 layers of white cake layered with fruit and cream filling)
fresh fruit
white chocolate or white candy coating
paisley texture sheet
Assemble cake as desired except for fruit on top and ice with thin layer of icing. Cut paisley texture sheet large enough to wrap around entire cake, piecing together if necessary. Cut wavy top edge slightly taller than edge of cake. Melt and temper chocolate or just melt candy coating. Place texture sheet on parchment between medium size perfection strips. Pour chocolate over texture sheet and scrape off excess. Move texture sheet to clean surface and when almost set wrap around cake. Place in refrigerator for 5 to 10 minutes until completely set and then remove texture sheet. Top the cake with fresh fruit.


21 Years Paisley Cake

Tools and Ingredients
"2" and "1" cake iced with thin layer of buttercream
fondant
orange colouring
pink colouring
royal icing
paisley texture sheet
Roll out orange fondant and impress with paisley texture sheet. Cover board. Roll out pink fondant and impress with paisley texture sheet and cover both numbers. Place both cakes on covered cardboard. Thin royal icing and color 2 shades of pink and 2 shades of orange. Fill parchment cone with each colour and cut small hole in tip. Add fine lines and details along several of the paisley impressions.

WOWEE our new Rainbow dust advertisement


Well as you all know Kiwicakes is the NZ distributor for Rainbow dust products (non toxic glitter, edible lustres, edible glitter shapes & matte dusting powders). Check out the new advertisement we've created for the NZCDG magazine. It lists all NZ stockists (and will be updated, as we get new stockists). I think you'll all agree, it looks fantastic. look for it in your next copy of the NZCDG magazine.

Wow I just love Autumn Carpenter mini cookie sets

Wow, I'm in love with the new AC mini cookie cutter & impression mat designs, they just keep getting better! I hope you enjoy using some of these ideas for cookies.


Cookie Cutter Texture Sets- Mini Wedding SetDecorate cookies using the texture mats for a simple way to get an elegant, professional-looking design, or enhance and embellish the textured cookie with flowers or icing.
Mini wedding set includes 2 cutters, 2-1/4" dress and 2" cake and three different texture mats, each with two designs. Cookie recipe included. Click here to buy mini wedding set


Painted and Pearl Mini Wedding Cookies


Tools and Ingredientsmini wedding cookie cutter texture set
white fondant
blue gel coloring
yellow gel colouring
green gel colouring
pink gel colouring
fine brush
Lightly spray one mini wedding texture mat from mini wedding cookie cutter texture set. Wipe off excess with a paper towel. Roll white fondant to approximately 1/8" thickness. Place texture mat on fondant. Firmly roll over the mat. Remove mat. Cut textured fondant (both the dress and cake) with appropriate cookie cutter from set. Dust with pearl lustre. Attach to a baked and cool wedding cake and dress cookie with piping gel or a thin layer of buttercream. Repeat with other texture mats to have one of each style of cookie. Thin gel food coloring with a few drops of water (a paint tray works great for multiple colors). Use the brush to paint over details of flowers, bow on dress, bow on cake and scrolls on dress.


Mini Wedding Cookie Bouquets


Tools and Ingredients
mini wedding cookie cutter texture set
white fondant
pearl lustre
candy clay
pearlized white jimmies
terracotta pot
Lightly spray one mini wedding texture mat from mini wedding cookie cutter texture set. Wipe off excess with a paper towel. Roll white fondant to approximately 1/8" thickness. Place texture mat on fondant. Firmly roll over the mat. Remove mat. Cut textured fondant (both the dress and cake) with appropriate cookie cutter from set. Dust with pearl lustre. Attach each to baked and cool wedding cake and dress cookie (insert 6” paper sucker stick into cookie before baking) with piping gel or a thin layer of buttercream. Repeat with other texture mats to create multiple pots. Wrap candy clay in plastic wrap and push to bottom of pot. Insert sucker sticks and fill remainder of pot with pearlized jimmies.


Perwinkle and Fuschia Mini Wedding Cookies


Tools and Ingredients
mini wedding cookie cutter texture set
white fondant
periwinkle fondant
fuchsia fondant
periwinkle royal icing
fuchsia royal icing
pearl spray
parchment cone or a pastry bag with a #1 tip
small flower blossom plunger cutter
mini daisy plunger cutter
Dot dress and cake: Lightly spray dot mini wedding texture mat from mini wedding cookie cutter texture set. Wipe off excess with a paper towel. Roll white fondant to approximately 1/8" thickness. Place texture mat on fondant. Firmly roll over the mat. Remove mat. Cut textured fondant (both dress and cake) with appropriate cookie cutter from set. Cut top and bottom of dress to remove the band. Spray all pieces with pearl spray. Roll out fuchsia fondant and cut replacement band. Attach to baked and cool wedding cake and dress cookie (both white and fuchsia parts) with piping gel or a thin layer of buttercream. Use fuchsia royal icing, thinned with a bit of water, to pipe a row of small dots along the bottom edge of the top and bottom tier and at the intersection of the quilting on the middle tier of the cake. Use periwinkle royal icing, thinned with a bit of water, to pipe over the stripes on the bottom tier, to pipe a row of dots as the bottom border on the middle tier and on top of the dots on the top tier. Roll periwinkle fondant very thin and cut out three small blossoms using plunger cutter. Attach to cake at the top of the swags with a small dot of royal icing. Fill centers of flowers with thinned fuchsia royal icing. Roll fuchsia fondant very thin and cut out one small daisy using plunger cutter. Attach to dress at band with a small dot of royal icing. Fill center of flower with thinned periwinkle royal icing.

Bow dress and cake: Lightly spray bow mini wedding texture mat from mini wedding cookie cutter texture set. Wipe off excess with a paper towel. Roll white fondant to approximately 1/8" thickness. Place texture mat on fondant. Firmly roll over the mat. Remove mat. Cut textured fondant (both dress and cake) with appropriate cookie cutter from set. Cut dress at waist and remove top. Spray cake with pearl spray. Roll out periwinkle fondant and place texture mat on fondant. Firmly roll over the mat. Remove mat. Cut textured fondant (just dress) with appropriate cookie cutter from set. Cut dress at waist and remove bottom part. Attach to baked and cool wedding cake and dress cookie (both white and periwinkle parts) with piping gel or a thin layer of buttercream. Use fuchsia royal icing, thinned with a bit of water, to pipe flower petals on top of dress. Use periwinkle royal icing, thinned with a bit of water, to pipe centers of flowers on dress top and randomly all over cake. Press small ball of fuchsia fondant into bow design on texture mat for both the dress and cake. Press firmly into cavity and remove excess fondant. Use a straight pin to gently remove bow (may be easier to form in separate pieces) and attach to cookie on top of the raised bow with piping gel or royal icing.


Flower dress and cake: Lightly spray flower mini wedding texture mat from mini wedding cookie cutter texture set. Wipe off excess with a paper towel. Roll white fondant to approximately 1/8" thickness. Place texture mat on fondant. Firmly roll over the mat. Remove mat. Cut textured fondant (just cake) with appropriate cookie cutter from set. Spray cake with pearl spray. Roll out periwinkle fondant and place texture mat on fondant. Firmly roll over the mat. Remove mat. Cut textured fondant (just dress) with appropriate cookie cutter from set. Attach to baked and cool wedding cake and dress cookie with piping gel or a thin layer of buttercream. Roll periwinkle, fuchsia and white fondant very thin and cut a variety of small flowers using plunger cutters. Make centers for the flowers by piping a different colored thinned royal icing in middle of flower. Attach flowers to raised impressions on cake with small dots of royal icing or piping gel. Use fuchsia royal icing, thinned with a bit of water, to pipe small dots on dress.

Brown and Pink Mini Wedding Cookie Bouquets


Tools and Ingredients

mini wedding cookie cutter texture set
chocolate fondant
pink fondant
pink royal icing
parchment cone or a pastry bag with a #1 tip
brown and pink M&M’s® candy
dark brown candy clay
pink and brown ribbon
vase or pot
Lightly spray bow mini wedding texture mat from mini wedding cookie cutter texture set. Wipe off excess with a paper towel. Roll chocolate fondant to approximately 1/8" thickness. Place texture mat on fondant. Firmly roll over the mat. Remove mat. Cut textured fondant (just the dress) with appropriate cookie cutter from set. Lightly spray flower mini wedding texture mat from mini wedding cookie cutter texture set. Wipe off excess with a paper towel. Roll chocolate fondant to approximately 1/8" thickness. Place texture mat on fondant. Firmly roll over the mat. Remove mat. Cut textured fondant (just the cake) with appropriate cookie cutter from set. Attach each to baked and cool wedding cake and dress cookie (insert 6” paper sucker stick into cookie before baking) with piping gel or a thin layer of buttercream. Use pink royal icing, thinned with a bit of water, to pipe a row of small dots along the bottom edge of each tier and to trace over the flowers on both the dress and cake. Press small ball of pink fondant into bow design on texture mat. Press firmly into cavity and remove excess fondant. Use a straight pin to gently remove bow (may be easier to form in separate pieces) and attach to cookie on top of the raised bow with piping gel or royal icing. Fill vase or pot with candy clay or brown and pink M&M’s® and insert sucker sticks. Tie bow with brown and pink ribbon around vase.


Green and Blue Mini Wedding Cake Cookies


Tools and Ingredients
mini wedding cookie cutter texture set
white fondant
purple fondant
green fondant fondant
medium blue fondant
light blue fondant
purple royal icing
green royal icing
light blue royal icing
parchment cone or a pastry bag with a #1 tip
small flower blossom plunger cutter
mini daisy plunger cutter
Bow wedding cake: Lightly spray bow mini wedding texture mat from mini wedding cookie cutter texture set. Wipe off excess with a paper towel. Roll white fondant to approximately 1/8" thickness. Place texture mat on fondant. Firmly roll over the mat. Remove mat. Cut textured fondant (just cake) with wedding cake cookie cutter from set. Attach piece to a baked and cool wedding cake cookie with piping gel or a thin layer of buttercream. Use green royal icing, thinned with a bit of water, to pipe a row of small dots along the bottom edge of each tier. Use blue royal icing, thinned with a bit of water, to pipe rows of triple dots all over cake. Press small ball of purple fondant into bow design on texture mat. Press firmly into cavity and remove excess fondant. Use a straight pin to gently remove bow (may be easier to form in separate pieces) and attach to cookie on top of the raised bow with piping gel or royal icing.
Stripes and dots cake: Lightly spray stripes and dots texture mat from mini wedding cake cookie cutter texture set. Wipe off excess with a paper towel. Roll purple fondant to approximately 1/8" thickness. Place texture mat on orange fondant. Firmly roll over the mat. Remove mat. Cut textured fondant with cookie cutter from set. Cut the bottom tier and attach to a baked and cool wedding cake cookie with piping gel or a thin layer of buttercream. Roll medium blue fondant to approximately 1/8" thickness. Place texture mat on fondant. Firmly roll over the mat. Remove mat. Cut textured fondant with cookie cutter from set. Cut the middle tier and attach to a baked and cool wedding cake cookie with piping gel or a thin layer of buttercream. Roll green fondant to approximately 1/8" thickness. Place texture mat on fondant. Firmly roll over the mat. Remove mat. Cut textured fondant with cookie cutter from set. Cut the top tier and attach to a baked and cool wedding cake cookie with piping gel or a thin layer of buttercream. Use purple royal icing, thinned with a bit of water, to pipe on top of impressed dots on top tier and to pipe a row of small dots as a bottom border for the middle tier. Use blue royal icing, thinned with a bit of water, to pipe on dots going up the stripes on the bottom tier and to pipe a row of small dots as a bottom border for the top tier. Use green royal icing, thinned with a bit of water, to pipe on swags on the bottom tier. to pipe a row of small dots as a bottom border for the bottom tier and to pipe small dots at the intersection of the quilting on the middle tier. Roll light blue fondant very thin and cut out three small blossoms using a plunger cutter. Attach the flowers to the cake with a small dot of royal icing or piping gel at the top of each swag. Use thinned purple royal icing to pipe centers for the flowers.
Flower wedding cake: Lightly spray flower mini wedding texture mat from mini wedding cookie cutter texture set. Wipe off excess with a paper towel. Roll green fondant to approximately 1/8" thickness. Place texture mat on fondant. Firmly roll over the mat. Remove mat. Cut textured fondant (just cake) with wedding cake cookie cutter from set. Attach piece to a baked and cool wedding cake cookie with piping gel or a thin layer of buttercream. Use purple royal icing, thinned with a bit of water, to pipe a row of small dots along the bottom edge of each tier. Roll light blue, purple and white fondant very thin and cut a variety of small flowers using plunger cutters. Make centers for the flowers by shaping small balls of the same colours of fondant. Attach different colored centers to flowers and flowers to raised impressions on cake with small dots of royal icing or piping gel.


Cookie Cutter Texture Set- Mini Baby SetDecorate cookies using the texture mats for a simple way to get an elegant, professional-looking design, or enhance and embellish the textured cookie with flowers or icing.
Mini baby set includes 2 cutters, 1-7/8" bib and 2" onesie and three different texture mats, each with two designs. Cookie recipe included. Click here to buy Bib & onsie cookie cutter set


Baby Girl Bib Cookies

Tools and Ingredients
mini baby cookie cutter texture set
pink fondant
purple fondant
yellow fondant
light yellow royal icing
light pink royal icing
light purple royal icing
Parchment cone or a pastry bag with a #1 tip
black food marker
orange food marker
small flower blossom plunger cutter
mini daisy plunger cutter

Rubber ducky bib: Lightly spray rubber ducky mini baby texture mat from mini baby cookie cutter texture set. Wipe off excess with a paper towel. Roll purple fondant to approximately 1/8" thickness. Place texture mat on fondant. Firmly roll over the mat. Remove mat. Cut textured fondant (just bib) with bib cookie cutter from set. Cut away inside part, leaving only the border edge. Lightly spray rubber ducky mini baby texture mat from mini baby cookie cutter texture set. Wipe off excess with a paper towel. Roll pink fondant to approximately 1/8" thickness. Place texture mat on fondant. Firmly roll over the mat. Remove mat. Cut textured fondant (just bib) with bib cookie cutter from set. Cut away outside part, leaving only inside the border. Attach both the pink and purple pieces to a baked and cool bib cookie with piping gel or a thin layer of buttercream, make sure the adjoining edges line up to each other nicely. Use yellow royal icing, thinned with a bit of water, to pipe small stitching details on the inside edge of the purple border. Press small ball of yellow fondant into rubber duck design on texture mat. Press firmly into cavity and remove excess fondant. Use a straight pin to gently remove rubber ducky and attach to each cookie on top of the raised rubber ducky with piping gel or a thin layer of buttercream. Use the orange food marker to color the duck’s nose orange and make one dot with the black food marker for the eye.

Yellow polka dot bib:
Lightly spray stripes and dots mini baby texture mat from mini baby cookie cutter texture set. Wipe off excess with a paper towel. Roll yellow fondant to approximately 1/8" thickness. Place texture mat on fondant. Firmly roll over the mat. Remove mat. Cut textured fondant (just bib) with bib cookie cutter from set. Attach the piece to a baked and cool bib cookie with piping gel or a thin layer of buttercream. Roll pink and purple fondant very thin. Use the small flower blossom plunger cutter and the mini daisy plunger cutter to cut two of each colour. Attach the smaller flower to the opposite color of a larger daisy with a small dot of royal icing. Attach randomly 4, two layer flowers to the cookie. Use yellow royal icing to pipe a small dot in the center of each flower. Use pink and purple royal icing, thinned with a bit of water, to pipe random dots all over inside part of bib. Use thinned pink royal icing to pipe stitching on inside of bib border.

“ABC” bib:
Lightly spray abc mini baby texture mat from mini baby cookie cutter texture set. Wipe off excess with a paper towel. Roll purple fondant to approximately 1/8" thickness. Place texture mat on fondant. Firmly roll over the mat. Remove mat. Cut textured fondant (just bib) with bib cookie cutter from set. Attach the piece to a baked and cool bib cookie with piping gel or a thin layer of buttercream. Roll pink and yellow fondant very thin. Use the small flower blossom plunger cutter to cut one pink blossom and the mini daisy plunger cutter to cut one yellow daisy. Attach the smaller flower to the larger daisy with a small dot of royal icing. Attach to the upper left hand corner of the cookie. Use purple royal icing to pipe a small dot in the center of the flower. Use pink royal icing, thinned with a bit of water, to pipe a thick border around the edge of the cookie and small dots on the inside of the border. Use thinned yellow royal icing to pipe small dots evenly spaced just inside the edge of the cookie.

Pastel ABC baby cookies


Tools and Ingredientsmini baby cookie cutter texture set
green fondant
light yellow royal icing
light pink royal icing
light blue royal icing
Parchment cone or a pastry bag with a #1 tip
Lightly spray abc mini baby texture mat from mini baby cookie cutter texture set. Wipe off excess with a paper towel. Roll green fondant to approximately 1/8" thickness. Place texture mat on fondant. Firmly roll over the mat. Remove mat. Cut textured fondant (both bib and onesie) with appropriate cookie cutter from set. Attach to baked and cool bib and onesie cookie with piping gel or a thin layer of buttercream. Thin each colour of royal icing by adding a small amount of water. Pipe over each letter of the “abc” with a different colour. On the onesie pipe small dots in a random pattern all over on the bib pipe small dots in repeating order just inside the edge of the border of the bib.

Pastel Baby Mini Cookie Bouquet


Tools and Ingredientsmini baby cookie cutter texture set
blue fondant
yellow fondant
pink fondant
purple fondant
green fondant
orange fondant
pastel M&M’s® candy
candy clay
vase or pot
Lightly spray one texture mat from mini baby cookie cutter texture set. Wipe off excess with a paper towel. Roll one color fondant to approximately 1/8" thickness. Place texture mat on fondant. Firmly roll over the mat. Remove mat. Cut textured fondant (both bib and onesie) with appropriate cookie cutter from set. Attach to baked and cool bib and onesie cookie (insert 6” paper sucker stick into cookie before baking) with piping gel or a thin layer of buttercream. Repeat with all the different mats using all 6 colors of fondant. Wrap ball of candy clay in plastic wrap and place in bottom of vase or pot. Insert sucker sticks into candy clay to form a bouquet. Fill vase or pot to top with pastel M&M’s® candy.

Rubber Ducky Baby Cookies


Tools and Ingredients
mini baby cookie cutter texture set
medium blue fondant
yellow fondant
orange food marker
black food marker
Lightly spray rubber ducky mini baby texture mat from mini baby cookie cutter texture set. Wipe off excess with a paper towel. Roll blue fondant to approximately 1/8" thickness. Place texture mat on fondant. Firmly roll over the mat. Remove mat. Cut textured fondant (both bib and onesie) with appropriate cookie cutter from set. Attach to baked and cool bib and onesie cookie with piping gel or a thin layer of buttercream. Press small ball of yellow fondant into rubber duck design on texture mat. Press firmly into cavity and remove excess fondant. Use a straight pin to gently remove rubber ducky and attach to each cookie on top of the raised rubber ducky with piping gel or a thin layer of buttercream. Use the orange food marker to colour the duck’s nose orange and make one dot with the black food marker for the eye.

Sunday, September 6, 2009

My day with Debbie Brown

Yesterday I attended a workshop with the Oh-so-Talented Debbie Brown (cake decorator extraordinaire.) We had a fantastic day, with Whangarei cake decorators guild members and visitors (including Malinda who had driven all the way from palmerston North). Debbie is an amazing teacher, very down to earth. She told us some great stories, and we were constantly laughing. That's my finished wedding couple above. A shot of Debbies couple she demonstrated is below.
I learnt some great hints & tips along the way, which will surely make my cakes better. And after having made these figures, which dDebbie repeated many times trhoughout the day "are made from ball shapes, tear drop shapes & sausages - anyone can do it, if you're shown how". She also stressed how important it was to realise there is no "right way", take her ideas and give them your own twist. She also divulged - none of the cakes in her books are airbrushed. And many have a leaf "just there", or embellishment "there" to hide a cake crumb or imperfection in the icing (been there done that myself)


Thats Malinda on the left from Palmerston North, Debbie - of course! and me.


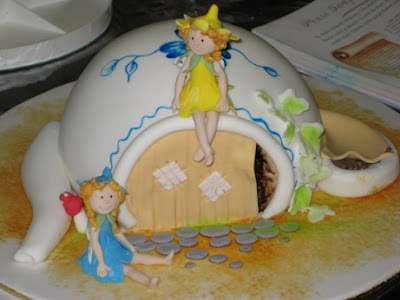
Here's a pic of the Pixie Teapot Debbie demonstrated in 1 1/2 hours.

Friday, September 4, 2009

Tommorrow is Debbie Browns workshop

I can hardly wait. Tommorrow is the Debbie Brown workshop and demonstration. Debbie arrived in NZ some weeks back, she started her workshops in the South Island and Whangarei is the last stop on her NZ tour. She hasn't done the same thing twice at any of her workshops. Our workshop is to be the Bride & groom figure featured below (photo used with written permission from Debbie Brown). If mine looks half that good, I will be a happy lady! Our demonstration will be the pixie teapot.

Monday, August 31, 2009

One of my SPCA cupcakes


Here is one of my SPCA cupcake day cupcakes. I had the best intentions in the world, of creating more dog cupcakes as well, like the ones I did earlier this month, for the SPCA photo shoot for the newspaper (see earlier post). But I simply ran out of time. Trying to keep the business running and look after the children, there was simply no time left last night. However I'm pretty pleased with what I did pull off. I'm just back from having dropped a box off to Poppy's school, for the teachers staff room. I'd been wanting to try making Baileys irish cream icing for a while. So this is what I topped them with. The round circle is made using white chocolate on a transfer sheet, just befor eit set, I cut out circles with a round cookie cutter. The black cat is fondant.
I couldn't resist using my new SPCA teatowels for the photo backdrop. Who said stripes on stripes didn't work?

Saturday, August 29, 2009

Check out the SPCA cupcake day creations

Check out all the cupcake creations submitted to the SPCA cupcake day website

http://spcacupcakeday.co.nz/competition/2-competition/2-most-creative-cup-cake

I'm making my cupcakes tommorrow, and will be uploading pics on Monday

Rainbow Dust is Halal and Kosher approved


As you all know by now, Kiwicakes is the NZ distributor for Rainbow Dust products. The range consists of edible silk lustre dusts, glitter shapes, matt dusting powders and non toxic sparkle dusts. Here is a link to Rainbow dusts food safety certificates for Halal & Kosher, as well as this, Rainbow dust is nut & gluten free, they are also suitable for vegetarians.


Tuesday, August 25, 2009

Kiwicakes & SPCA cupcake day


Well you've all already heard how I'm making cupcakes for the SPCA on cupcake day, and for every cupcake I sell, Kiwicakes will be matching the purchase price. Well here I am in the local newspaper, along with Andrea fromt he SPCA (that's Andrea with Armani the cat). Not the most flattering photo of me, but then, don't we always think that?
I had fun making the puppy cupcakes.

Autumn Carpeneters new designs

I was thrilled to receive an email today, from the oh - so talented Autumn Carpenter, she's added Kiwicakes, as a stockist to her website, and congratulated me, on a blog well done. I am pleased to be able to say, we have all the new AC designs on the way, these should be loaded in aprx 1 week. If you'd like to see everything Autumn offers, check out her website www.autumncarpenter.com

Monday, August 24, 2009

Haute couture cupcake wrappers

Kiwicakes is proud to be the first stockist in New Zealand of these gorgeous haute couture cupcake wrappers. These are this weeks "favourite thing!" All have such pretty names. Lulu in black & white would be perfect for a black & white themed wedding. Olvia, is just perfect for those incorporating Koru in to their event. And Hannah in chocolate brown and blue(my personal favourite) is just perfect for ANYTHING! really.


Bella Cupcake Couture offers posh and chic textile-inspired cupcake wrappers. These boutique-style designs are exquisite and offer a sophisticated elegance to any special occasion; weddings, baby and bridal showers, birthdays, celebrations, and just because.


Where cupcakes meet fashion. The chic textile-inspired patterns mix elegant hues like chartreuse, chocolate brown, citrus or soft pinks, making every cupcake look stunning. Each design encourages you to enjoy simple pleasures and savour the sweet life.

Wrapped in Style. The designs come in a variety of styles including floral, swirls and damask. Each wrapper is available in a pack of 12 or 50 and measures 3.25" wide and just under 2" tall. These cupcake wrappers are for presentation only and not appropriate for baking. Each design is printed with soy inks on recycled paper.
That's haute! Make the moments in your life extra special, creative and stylish for you and those you care about. Simply bake or buy your favourite frosted cupcake and set inside wrapper for an elegant finish. No matter which type of cupcake you enclose it around; red velvet, lemon drop, double chocolate, plain vanilla... it is sure to be adored!

Sunday, August 23, 2009

A quick cake I made for Janet


I made this cake for my dear friend Janet. I go to body combat exercise classes twice a week with Janet. She invited me and some of the girls to her birthday at our local Thai restaraunt. We had a great night and I was out dancing until 12.30. For this Mum of small kids, that's a major accomplishment! - especially when I realised I hadn't been dancing since before my eldest was born (and I love dancing!).

Janet didn't know she was getting a cake, it's always so nice to surprise someone. The cake was chocolate fudge, with a Baileys Irish creme buttercream under the white chocolate slabs, which had a design of stripes, using chocolate transfers.
Apologies for quality of photo, it was taken in failing light and the only place I got get a halfway decent photo, was on the deck outside

Saturday, August 15, 2009

Tools I can't live without! #3

I often get asked - what tools I can't live without. I get asked by curious customers as well as people buying for the cake decorating fan in their life. So I thought I'd begin to share a few of my all time favourites with you. In no particular order - here goes #3 Piping or decorating bags OK OK, so we all use them. But there are uses beyond the obvious. I favour a 12'' bag for my piping work, I can get enough twist at the back end, to stop my icing going out backwards (a rubber band, also helps in this department). And no matter how tempted you are to put heaps of icing in the bag, the less icing you have in the bag, the faster you pipe, saving you more time in the long run (a good guide, is enough icing that you can comfortably squeeze in your hand, icing should not be up higher than width of your palm).

Disposable bags are great for piping chocolate, I piped the white chocolate coral on plastic sheet, simply by filling a disposable bag with white chocolate, then I snipped the end of the bag, to reveal a very fine hole - then hey presto, pipe with a wiggling action and you have coral, Freeze 2-3 mins and peel back plastic sheet. (Coral is overdusted with sparkle dust)


Although I had seen a large piping bag used to fill small cakes on cooking shows, I NEVER COULD HAVE IMAGINED HOW GREAT IT WAS!!! - until I tried it. Not only did I not get drips over the edges of my paper cupcake cases (which look ugly when they are cooked), I filled the cupcakes in no time flat. To fill bag - place over an open necked vessel, tip cupcake batter in to bag, twist off back end and proceed to fill cupcakes, just bend tip of bag up with 1 finger to stop flow in between cupcakes. If you follow this method, you will not be sorry. Bag can of course be used for icing too.

Tools I can't live without! #2


I often get asked - what tools I can't live without. I get asked by curious customers as well as people buying for the cake decorating fan in their life. So I thought I'd begin to share a few of my all time favourites with you. In no particular order - here goes #2 rotating cake stands or turntables I wouldn't be without them. Gone are the days, where I contort my body to reach the back side of a cake, or try to move a cake board across the bench, only to slip & stick my finger in my beautiful icing. I own both a tilting turntable & a low flat one. The tilting turntable I find gives me extra height, to get the cake closer to me, when I stand at the bench, as I don't like to bend down (after 3 hours, I suddenly find my neck & back are sore). My low flat one, is great for taking photos of my cake, from all sides. I also use it when presenting the cake to the birthday person, as no matter where they choose to sit at the table, the cake can always be gently turned to face them, with ease.

Tools I can't live without! #1


I often get asked - what tools I can't live without. I get asked by curious customers as well as people buying for the cake decorating fan in their life. So I thought I'd begin to share a few of my all time favourites with you. In no particular order - here goes #1 TIP COVERS Oh my goodness, where would I be without them. The pop right over the top of a Witon coupler and decorating tip. Meaning if you stop for lunch, or to take a break, your icing doesn't dry up in the nozzle. At only $4.50 for 4, these would have to be one of the best value for money around.

Wednesday, August 12, 2009

How To Make a Topsy-Turvy Whimsical Cake


This is my last rave about http://www.cakecentral.com/ for the day. I urge you all to join (it's free) and go check out the wonderful tutorials they have on offer. Whilst many of us, are prepared to give any cake a go, by looking at a picture in a book, the topsy turvy cake, is one cake, where we could all use some instructions. This technique is a fun optical illusion that makes your cake appear topsy-turvy. Check out the full tutorial for this cake at http://cakecentral.com/articles/6/how-to-make-a-topsy-turvy-whimsical-cake

How to make a royal icing tiara


http://www.cakecentral.com/ is the font of all knowledge, I urge you all to sign up (it's free!). Check out this great tutorial for how to make an icing tiara.

How to make realistic butterflies for your cakes


http://www.cakecentral.com/ is simply one of the best how to websites check out the video tutorial for how to make reaslitic butterflies for your cake. I want to try it!

Wednesday, August 5, 2009

interesting facts from ecostore

I received my monthly newsletter from ecostore today. I've bought ecostore products for a long long time (currently in our house we use the dishwasher powder, dishwashing liquid, soap, laundry detergent, baby shampoo, bath gels, shower cleaner, insect repellent - and there's probably more I've forgotten ANYHOO, this is what made such interesting reading today.

"What's happening to laundry powders?
You may have noticed that mainstream laundry brands have been reformulating their washing powders into 2x concentrated powders or solutions. As you may know our laundry powder has always been highly concentrate and still is much more concentrated than the new ultra concentrated versions of conventional brands. A 1kg box of ecostore laundry powder gives you 32 standard washes - which is almost 40% more value than competing brands, which offer only 23 standard washes. As well as saving you money, less packaging required in the ultra-concentrated formula also means less waste for the environment, and we all like that!
What's really exciting for us though is that we've recently done some calculations and worked out that over the last five years alone, people using ecostore laundry powder, instead of mainstream brands, have helped prevent 4.4 billion litres of nasty chemical laden grey water from going into our water systems. That's enough for 1 million people to shower daily for 3 months. A fantastic effort all round! It's nice to know that small things can collectively make a big difference."
As well as

"The bottom line on bubbles
Did anyone see the Target story recently about dishwashing liquid? A common misperception is that the more bubbles a dishwashing liquid or powder produces, the better the cleaning result for their crystal glasses, cutlery and plates.
However, as some of you may know, the presence of soap suds has no bearing on how well a dishwashing product is cleaning your dishes. ecostore's dishwash liquid won't produce a lot of foam because it doesn't include toxic foam-boosting chemicals. As far as we're concerned, that's just another pollutant down the drain our waterways can do without. It still cleans your dishes just as effectively, with no harmful chemical residues to worry about."

Tuesday, August 4, 2009

How to pipe a buttercream rose


Wilton have added a nifty instruction video to their buttercream rose instructions. I find it so hard to find written instructions for rose piping, so maybe this will be of help to some of you too!
http://www.wilton.com/videos/video_popup.cfm?id=DC6593B2-1E0B-C910-EA17F0E6859F62B3

Monday, August 3, 2009

Red Velvet Cake

Red velvet is cake is gaining in popularity here in NZ. For those of you that do not know what it is, it's cake that is coloured, you guessed it RED. Orginally it was coloured with the juice of beets, but this has long given way, to artificial colouring with most people.
Most recipes call for a small amount of VINEGAR.
Vinegar is integral to this recipe and should not be skipped - Vinegar combined with cocoa produces a faint red colour, greatly enhancing the redness of your cake.
When colouring your cake red, opt for one of the "no taste" red colourings, to avoid the metallic taste, many red colourings add.

Sunday, July 26, 2009

Fudge using Marshmallow

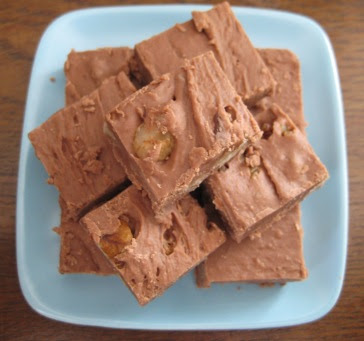
I'd always wanted to try making fudge the American way, with Marshamllow fluff. My dear friend Kat (from Whangarei cake tin hire) also wanted to try it, so I sent her home with a jar of Marshamllow fluff and a bag of chocolate. The result was delicious.
For those of you that want to try it yourself.

What You Need3 cups sugar
170g butter or margarine
1 small can (5 oz.) evaporated milk (about 2/3 cup) (Do not use sweetened condensed milk.)
360g dark chocolate (can use cooking chocolate)
1 jar (7 oz.) JET-PUFFED Marshmallow Creme
1 cup chopped Walnuts
1 tsp. vanilla

Make It
LINE 9-inch square pan with foil, with ends of foil extending over sides of pan; set aside. Place sugar, butter and evaporated milk in large heavy saucepan. Bring to full rolling boil on medium heat, stirring constantly. Boil 4 min. stirring constantly to prevent scorching. Remove from heat.
ADD chocolate and marshmallow creme; stir until completely melted. Add walnuts and vanilla; mix well.
POUR immediately into prepared pan; spread to form even layer in pan. Let stand at room temperature 4 hours or until completely cooled; cut into 1-inch squares. Store in tightly covered container at room temperature.

New member of staff at Kiwicakes


Here's our newest member of staff at Kiwicakes - Bilbo! he's 8 weeks old and my children love him to bits. I don't think he'll be much use for packing parcels, as I don't think I could trust him with them.

Friday, July 24, 2009

Kiwicakes now has wholesale arm

Well today, I am able to announce an exciting development. Kiwicakes has been appointed the sole NZ distributor for Rainbow dust products. The good news is, we can now offer Wholesale pricing, to retail businesses for resale, registered companies, bakeries, teaching institutions and licensed kitchens.

We have the entire range of 70 non toxic glitters, 39 COMPLETELY edible petal dusts from the plain & simple range and more than 30 COMPLETELY edible lustre dusts in stock. As well as the popular COMPLETELY edible gold stars and pink hearts.
The entire range can viewed at http://www.rainbowdust.co.uk/ Rainbow dusts website is user friendly and for those of you selling online, there is a full catalogue of colour images, you can use to promote the product.

It is our intention, to be able to process all orders immediately, with no back-ordering, but if due to high demand, we are temporarily out of a product, we will endeavour to dispatch with minimum waiting times.

We have a Minimum order value of $150 and payment is required prior to dispatch. Freight is flat rate of $7.50, regardless of order size.

If you would like wholesale pricing information, please feel free to email me with your business details on sandra@kiwicakes.co.nz or phone 0210770600. Please also feel free to contact me, if you require any additional information.

Tuesday, July 21, 2009

Cool new cookie cutter


This is my new favourite thing for the week. An NZ map 14cm stainless steel. Only 9.95. Also comes as a twin pack with 10.5cm Kiwi for $14.50

Sunday, July 19, 2009

SPCA Cupcake day August 31st 2009


We all know what a great job the SPCA does looking after the unloved & mistreated animals in New Zealand, but what many do not know, is this organisation is NOT government funded. I have always donated to the SPCA appeals, but when I saw the "SPCA Cupcake day" I couldn't wait to get involved.

I will be producing animal themed cupcakes for the SPCA cupcake day August 31st 2009, they will be available for $2 each. For everyone that purchases a cupcake - Kiwicakes will match the $2 purchase price. Check out the details at http://www.spcacupcakeday.co.nz/ So if you're in Whangarei on August 31st and would like to collect a cupcake, let me know ahead of time and I'll be sure to bake one just for you.

But wait THERE'S MORE! Place an order with Kiwicakes and let me know some of the items are being used for the SPCA Cupcake day and I'll include some freebies in your parcel, which will hopefully help with your creations (no false requests for freebies please, you need to be registered for the SPCA cupcake day to receive freebies with your order.)
You can further help, by purchasing cupcake branded merchandise from the SPCA. I've ordered my cupcake tea towels and can't wait for them to arrive.

Tuesday, July 7, 2009

Colour Wheel Chart


PRIMARY COLOURS

Red, Yellow, & Blue which are located in the centre of the wheel. All other colours are made from these.


SECONDARY COLOURS

Are located in the inner ring. Orange, Green, Violet, are made by mixing equal amounts of primary colours. Red + Yellow = Orange, Red + Blue = Violet, Blue + Yellow = Green


TERTIARY COLOURS

Located in the outer ring. These colours are made by mixing one primary colour with one secondary colour.
Red + Orange = Red orange, Orange + Yellow = Orange yellow, Yellow + Green = Chartreuse, Green + Blue = Aquamarine, Blue + Violet = Indigo & Violet + Red = Violet red

Colour mixing guide from Chefmaster

CHEFMASTER® PRODUCTS Food Coloring Manufacturer Guide

Apricot – 2 parts Orange & 1 part Egg Yellow
Maroon – 4 parts Red Red & 2 parts BurgundyRaspberry – 3 parts Bakers Rose & 1 part Christmas Red
Aqua – 5 parts Sky Blue & 1 part Leaf Green
Ivory – 1 Liquid Whitener & a touch of Brown and Egg Yellow
Ruby Red – 1 part Holiday Red and a touch of Black
Avocado – 4 parts Lemon Yellow & 1 part Leaf Green and a touch of Black
Jade – 1 Leaf Green & 1 Royal Blue & a touch of Black
Rust – 8 parts orange & 2 parts Red Red & 1 part brown
Burgundy – 5 parts Bakers Rose & 1 part Violet
Lavender – 5 parts pink & 1 part Violet
Sea Gold- 2 parts Sky Blue & 1 part Leaf Green
Chartreuse – 2 parts Lemon Yellow & 1 Leaf Green
Marigold – 3 parts Lemon Yellow & 1 part orange
Silver – 1 part Black and 1 part Blue
Copper – 1 part Egg Yellow & 1 part Brown & 1 Christmas Red
Melon – 1 part Orange & 3 parts Bakers Rose
Skin tone – 12 parts orange & 4 parts Bakers Rose & 1 part Royal Blue
Coral – 3 parts Rose Pink & 2 parts Lemon Yellow
Moss Green – 2 parts Violet & 3 parts Lemon Yellow
Teal – 9 parts Sky Blue & 1/2 part Lemon Yellow
Dusty Rose – 2 parts Christmas Red & 1 part Malt Brown
Navy Blue – 1 part Sky Blue & 1 part Violet
Turquoise – 6 parts Sky Blue & 1 part Lemon Yellow
Gold – 10 parts Lemon Yellow & 3 parts Orange & 1 part Christmas Red
Persimmon – 1 part Orange & 1 part Bakers
RoseWine – 3 parts Holiday Red & 2 parts Rose
PinkPlum – 1 part Violet & a touch of Christmas Red
Grape – 1 part Sky Blue & 6 parts Bakers Rose
Misty Green – 2parts Leaf Green & 1 part of Royal Blue & a touch of Black
Note: Blend the colors before adding them to the icing. Add the blended color to the icing to get the shade desired.

Saturday, July 4, 2009

Wilton's Halal certificate


One of my lovely customers Sakinah sent me details of Wiltons Halal certificate. She said (abridged)


"While I was surfing the blogs, I found something to my delight. It is a Halal Certificate for Wilton products (as listed in the certificate). For muslims like me, I would like to know what I can consume in my cakes."

Related Posts Plugin for WordPress, Blogger...