Showing posts with label Valentines day. Show all posts

Friday, January 30, 2015

Valentines day - open heart cupcakes


These heart cupcakes started with an idea from Glorious Treats (although my method was a little different). They are quick and easy to make and something a little different to a fully frosted cupcake.


Take your favourite cupcake and using a heart cutter press gently down, this will cut a heart in to your cupcake. You then need to slide a knife under the heart to remove a shallow piece.


I coloured my buttercream icing with pink progel colouring. I fitted my piping bag with a bismarck tip to make it easy to fill the cavity.


I coloured my icing sugar pink using Rainbow Dust colour (please note I used an edible pink, I've inadvertently photographed the wrong pink and shown a craft dust here)


Shake the two together and the resulting icing sugar is pink, this is dusted over the surface of the cupcake.

Thursday, February 13, 2014

Valentines chocolate box heart cake


What's better than a box of chocolates for Valentines day? A chocolate box cake of course. This cake was very quick and simple to make. I baked a heart shaped chocolate mud cake.


I coated it in pink buttercream, then covered with a layer of hot pink Satin Ice fondant. To form the sides of the box I used a ribbon cutter. I cut a strip of red Satin Ice fondant to which I added some tylose (to harden). Then a box of chocolates was arranged on the top of the cake. You can use store bought or make your own chocolates or truffles.


To fill in the little gaps between the chocolates I used strings of gum paste pearls, which can be easily formed with the help of a bead maker. A scrumptious decadent treat for Valentines day in under 30 minutes.

Wednesday, February 12, 2014

Heart cookie - simple & effective tips


Recently at our monthly cake guild meeting the committee members of our guild set up different "have a go" stations. In an attempt to get all of our members trying out new techniques. Laura made this pretty heart shape cookie. Some very simple techniques were combined, to make a stylish gift of love. The smaller white heart was cut from a piece of fondant, that has been embossed with a floral texture mat from this set. It is embellished with tip#2 piped royal icing dots.

Thanks to Ann, Anne and Janelle for setting up the have a go stations at guild night.

Monday, February 10, 2014

Rainbow Valentines Love - from Kiwicakes Test Kitchen


Today's rainbow coloured heart cookies are based on traditional cutesy valentines sweets. With the romantic day approaching we want to inspire all you bakers to get inventive and show your love through your craft!


The magic tools I used were LorAnns punchy flavoured oils and droppers, Progel food colouring, Heart Cutter  and most importantly the tiny alphabet Message Maker.


To make 6 coloured cookie doughs the total quantity of ingredients you will need is:

250g block of butter, softened
2 cups sugar
1 tin condensed milk
6 cups flour + extra for dusting
baking powder, flavours and colours.

It is a big yield of 100+ cookies. It'd be too difficult to work in smaller quantities but you could reduce the number of coloured doughs you make. I figure you can never have too many cookies anyway and these freeze beautifully in snaplock bags for whenever you are ready. 

This project is not light on prep time, but don't let this put you off as the results are so worthwhile! A stand/hand mixer is essential. As a day-off activity this is the perfect way to show your love! Here is the finished product again for some motivation...


Rainbow Valentines Cookies (x6 mixtures)

Cream together: 75g softened butter, 1/3c sugar, 65g condensed milk, 6 drops LorAnn flavour oil and a small squirt of Progel colour.

Mix in: 1 scant cup flour and a rounded 1/4t baking powder to form a dough.

Repeat 6 times and wrap individual doughs in clingfilm until ready to use. Cookies take 10 mins to bake at 175`c.


The message maker is fantastic for personalising messages on any of your baking and cake decorating projects. The letters are 6mm tall so could be inconspicuous if you want them to be! I found that a pair of nail clippers worked well to snap off the joining tabs between the letter and alphabet pieces. It'd be worthwhile doing this job in advance to add such a versatile piece to your sugar craft kit. Also remember to enter the words you desire back-to-front in the stamp for a mirror image on your cookies (or fondant).


Roll your dough out onto a well-floured board til it is 1cm thick. Dust generously. Cut out heart shapes with the cutter but leave in their cavities. The surrounding dough will support the shape when a message is punched into it.


Stamp messages one line at a time. I found it easiest to line my two index fingers up with the extremities of the message to make sure they were centralised on each cookie. Use a long spatula to transfer cookies easliy to a lined baking tray.

Another hint is if you do your batches in a logical order, you wont need to wash your bowl or mixing blade or spatula in between colours!! I recommend starting with 1.Yellow 2.Tangerine 3.Pink 4.Purple 5.Ice Blue 6.Bright Green.


Here are the individual combinations I made - there are some AMAZING flavours available!


THAT SMILE - Ice Blue colour Progel with Lemonade flavour LorAnn Oil


4 EVA - Tangerine colour Progel with Mango flavour LorAnn Oil


TWEET ME - Yellow colour Progel with Banana Creme flavour LorAnn Oil


YOU ROCK - Pink colour Progel with Cotton Candy flavour LorAnn Oil


LETS KISS - Bright Green colour Progel with Pistachio flavour LorAnn Oil (Kiwicakes girls fav!)


YES DEAR - Purple colour Progel with Pomegranate flavour LorAnn Oil


These lovely treats are perfect paired with flavoured milk. Ours is presented in a cute glass milk bottle with a matching retro pink paper straw.


You can go crazy with the messages you personalise! My advice is to keep them short and sweet. Here are some other ideas...

CUTE STUFF - IM IN LOVE - FRIEND FOREVER - CALL ME - DREAM - HOPE - PEACE - MY  MAN - WRITE ME - HI LOVE - ANGEL - CUTIE PIE - MY WIFE - MARRY ME - ITS LOVE - CALL HOME - BE TRUE - HOME SICK - SMILE - THANK YOU - TRUE LOVE - YOU & ME - UR A TIGER - ONE KISS - DARLING - FIRST KISS - PUPPY LOVE - DARLING - BE MINE - ONLY YOU - LOVE LETTER - CUTE - HINT HINT - FOR EVER - HUG ME - LOVE BIRD - MAGIC - DARLING - LOVE IS SWEET - CUP CAKE - DARE YA - LOVER BOY - SWEET TALK - I WONDER - SWING TIME - TWO HEARTS - SOUL MATE - FRIEND ME - TEXT ME - XOXO - CRAZY 4 U - EMAIL ME - IM YOURS - FRIENDS - BFF - TRUE LOVE. 

Thursday, February 6, 2014

Summer strawberries - chocolate dipped with chocolate transfer detail


Chocolate dipped strawberries can be transformed with the use of chocolate transfers. It's quick and easy to do. Chocolate dipped strawberries are a fond memory of Valentines Day for me. My now hubby presented me with a bowl of strawberries for Valentines day that he'd dipped himself way back in the 1990s when we first started dating. At the time I was suitably impressed that he'd taken the time to make something for me. I'm still impressed today when I'm given a home made gift, made with love.


Chocolate transfers elevate the simple chocolate dipped strawberry to a whole new level. Chocolate transfers come in a wide variety of colours and patterns, to suit every occasion. You can view our entire selection here.

Simply melt your chocolate over a double boiler, dip each strawberry and place down on your chocolate transfer sheet. Once cool, lift your strawberries away from the sheet and place on your serving dish (I do not refrigerate my strawberries, as this makes them ooze juice).


Any portion of unused transfer can be reused for your second round of dipping, simply place your next strawberry down on any patch of colourful transfer, avoiding the clear spaces, where the colour has been removed by the previous strawberry.

Saturday, February 1, 2014

Strawberry pink champagne cupcakes


These cupcakes came about when I was tasked with making something for a cake guild meeting about "flavour profiles". I knew in advance what our demonstrator was making for the evening, so I tried to make something a little different to her flavours. The recipe formed and grew in my head as I was making them, and had a minor adjustment part way through.


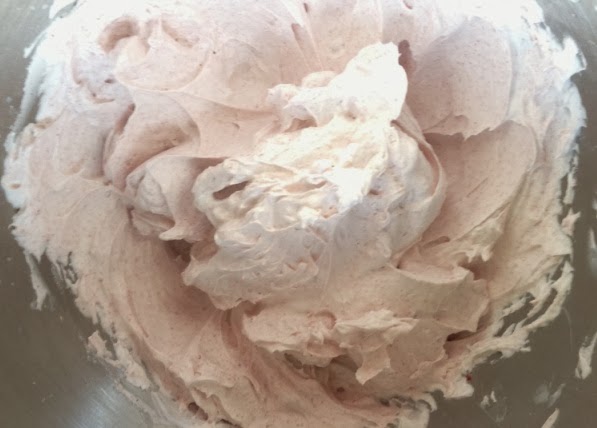
To my regular vanilla cupcakes, I added two tablespoons of freeze dried strawberry powder. I baked them in the usual way, but the resulting cake was a little too subtle in flavour. Here's where they took a turn for the better: I decided to add a Strawberry creme  to the centre of each cupcake using Gobake Easy Frost and freeze dried strawberry powder. It's super easy, the recipe for creme is right there on the packet. Any unused portion can be stored in the fridge or frozen to make ice-cream like this. I used a Wilton bismark tip to fill the centre of the cupcakes (using Wilton's method, which you can see here).


To my buttercream icing recipe I added a few drops of Americolor pink gel paste colour and some Lorann champagne oil flavouring. It was piped with a simple 1m swirl (these cupcakes were all about the flavour not the decoration). We had a lot of items to taste test during our guild evening. These were a hit on the night and I will definitely be making them again.

Sunday, January 24, 2010

Chocolate transfer hearts how to

Check out the "how to" to make these fantastic chocolate hearts below (full credit goes to the team at Roberts). If you need chocolate transfers, click here to buy.


Transfer sheets are a sturdy but flexible plastic sheet coated with a mixture of cocoa butter and FSANZ approved food colouring, which has been etched with a repetitive design. They come in a wide variety of designs and colours.

You can use the transfer sheets on any flat chocolate surface or to decorate biscuits, cakes and deserts. Just apply the same basic application method to whatever you wish to decorate - you can achieve amazing and impressive results with ease.

Transfer sheets can be used with any type of chocolate. Milk or dark chocolate will show gold designs to their best advantage, white chocolate will highlight pastel or lighter colours with great effect. Each sheet is for one application only. You can cut sheets to the specific size you require and tape them together on the underside to make longer strips.
How to use

Basic Application:


Step 1. Make and bake your favourite cupcake recipe using co-ordinating cupcake papers for your theme. Ice the cooled cupcakes - I've used a basic butter frosting for these.
Step 2. Melt the chocolate melting buttons using your preferred method. I like using a small slow cooker as it keeps the chocolate melted and at the right temperature for as long as I need it.
Step 3. Make a template of the small plain heart. I placed a piece of paper over the back of the mould and rubbed around the edges with a marker pen. Step 4. Cut out the template but making it slightly smaller. You are wanting the final shape to fit easily into the bottom of the mould. Make sure there are no edges curling up the sides.

Step 5. Using your heart stencil, cut out the heart shape from the Chocolate Transfer Sheet using scissors. Step 6. Ensure the cut pieces fit freely in the bottom of the heart mould. Place it smooth side down, rough side up. Gently spoon the melted chocolate into the mould until it is filled just to the top. Gently tap the mould onto a flat surface to release any air bubbles. Then let it set in the fridge.
Step 7. To make sure your chocolate is set, look at the underside of the mould. It should look dull and slightly retracted from the edges. If it still looks wet and glossy then it is not yet set.


Step 8.
Once the pieces are set, turn the mould upside down and gently tap on the bench (put a teatowel down first to soften the surface). The pieces should remove easily. If they don't, it means the chocolate still isn't fully set. Leave for a little bit longer. The piece will look like this with the plastic still on top. Step 9. Peel away the plastic. You may have to gently pick to find the edge of the plastic, but once found, it will peel away easily.
Related Posts Plugin for WordPress, Blogger...