Wednesday, February 26, 2014

White chocolate caramel macadamia truffles


These truffles came about when I agreed to take truffles to an event, but late at night after the shops were closed I discovered I didn't have the ingredients for my other recipe. 


I couldn't resist a photo for you that includes my ultimate truffle dipping tool, the humble toothpick. I've tried many of the fancy gadgets out there, but find nothing works better for me than a toothpick.

Ingredients
250g crushed Graham crackers (if you have trouble finding this biscuit in NZ, you can subsitute Round Wine biscuits)
1x Philadelphia Cream cheese block 250g.
1 Cup ground macadamia nut
250g Nestle caramel baking bits
125g white chocolate
(milk or dark chocolate to dip)

Method
Melt caramel baking bits & white chocolate together over a double boiler. Set aside to allow to cool. In a food processor, crush biscuits to a fine crumb. Add macadamia nut and cream cheese pulsing to just combine. Add cooled melted chocolate and pulse again, mixture should form a ball. Chill for at least one hour. Roll in to small balls and dip in milk or dark chocolate. Place in foil truffle cups (these are best placed in a mini muffin pan for support whilst setting) and allow to set.

Tuesday, February 18, 2014

Underwear Cupcakes from Karina at Kiwicakes


Many of you that call in store at Kiwicakes will have met Karina at the counter. She's the person responsible for making sure all our online orders are packed well to arrive in great condition at your home.


Karina recently held an Intimo underwear party at her home and made these awesome underwear cupcakes for our dessert afterwards. She used this silicone mould to make the bra & knickers. They were coloured using the same method we use to colour paua shells. The stiletto boot cupcake papers can be found here.


Karina swears by this chocolate cupcake recipe from The Farm Chicks. She says she likes it "becuase you just put everything in one bowl".

We had a great evening at our underwear party, catching up with friends and sharing a lovely meal afterwards. I think Karina did a great job of her cupcakes and I can assure you they tasted great, too.

Monday, February 17, 2014

Afghan biscuits - A kiwi kids favourite


My youngest is just starting to get interested in cooking and baking. He's always been keen to jump in to any decorating though. Today we made afghan biscuits together. The recipe comes from our friends at Chelsea.

Ingredients
200g butter, softened
½ cup Chelsea Caster or Organic Sugar
1 tsp vanilla essence
1 ¼ cups plain flour
¼ cup cocoa
1 ½ cups cornflakes, lightly crushed
Icing:
1 ½ cups Chelsea Rich Chocolate Icing
1 Tbsp butter (softened)
1-2 Tbsp boiling water

Method 
Preheat oven to 180°C. Grease or line a baking tray with baking paper.
In a large bowl beat butter, sugar and vanilla until light and fluffy. Sift in flour and cocoa stir thoroughly with the butter mixture until combined before stirring in the cornflakes.
Place heaped teaspoonfuls on a baking tray, squeeze mixture together gently if necessary then press lightly with a fork.
Bake for 15-20 minutes. Cool on a wire rack before icing. 

Icing: Mix chocolate icing sugar, butter and 1 Tbsp boiling water at a time until combined, adding more hot water if necessary until icing is a spreadable consistency. Ice biscuits and top with half a walnut.

Thursday, February 13, 2014

Valentines chocolate box heart cake


What's better than a box of chocolates for Valentines day? A chocolate box cake of course. This cake was very quick and simple to make. I baked a heart shaped chocolate mud cake.


I coated it in pink buttercream, then covered with a layer of hot pink Satin Ice fondant. To form the sides of the box I used a ribbon cutter. I cut a strip of red Satin Ice fondant to which I added some tylose (to harden). Then a box of chocolates was arranged on the top of the cake. You can use store bought or make your own chocolates or truffles.


To fill in the little gaps between the chocolates I used strings of gum paste pearls, which can be easily formed with the help of a bead maker. A scrumptious decadent treat for Valentines day in under 30 minutes.

Wednesday, February 12, 2014

Heart cookie - simple & effective tips


Recently at our monthly cake guild meeting the committee members of our guild set up different "have a go" stations. In an attempt to get all of our members trying out new techniques. Laura made this pretty heart shape cookie. Some very simple techniques were combined, to make a stylish gift of love. The smaller white heart was cut from a piece of fondant, that has been embossed with a floral texture mat from this set. It is embellished with tip#2 piped royal icing dots.

Thanks to Ann, Anne and Janelle for setting up the have a go stations at guild night.

Monday, February 10, 2014

Rainbow Valentines Love - from Kiwicakes Test Kitchen


Today's rainbow coloured heart cookies are based on traditional cutesy valentines sweets. With the romantic day approaching we want to inspire all you bakers to get inventive and show your love through your craft!


The magic tools I used were LorAnns punchy flavoured oils and droppers, Progel food colouring, Heart Cutter  and most importantly the tiny alphabet Message Maker.


To make 6 coloured cookie doughs the total quantity of ingredients you will need is:

250g block of butter, softened
2 cups sugar
1 tin condensed milk
6 cups flour + extra for dusting
baking powder, flavours and colours.

It is a big yield of 100+ cookies. It'd be too difficult to work in smaller quantities but you could reduce the number of coloured doughs you make. I figure you can never have too many cookies anyway and these freeze beautifully in snaplock bags for whenever you are ready. 

This project is not light on prep time, but don't let this put you off as the results are so worthwhile! A stand/hand mixer is essential. As a day-off activity this is the perfect way to show your love! Here is the finished product again for some motivation...


Rainbow Valentines Cookies (x6 mixtures)

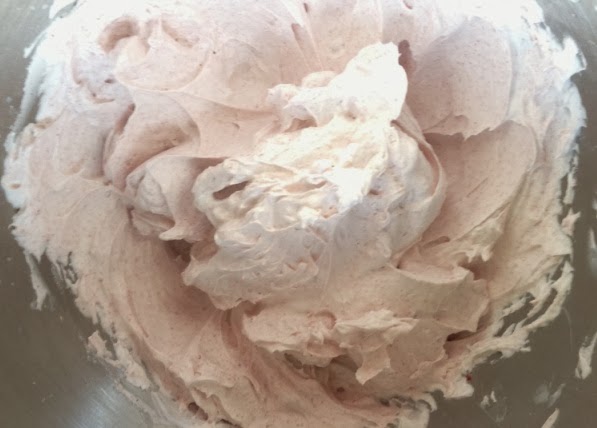
Cream together: 75g softened butter, 1/3c sugar, 65g condensed milk, 6 drops LorAnn flavour oil and a small squirt of Progel colour.

Mix in: 1 scant cup flour and a rounded 1/4t baking powder to form a dough.

Repeat 6 times and wrap individual doughs in clingfilm until ready to use. Cookies take 10 mins to bake at 175`c.


The message maker is fantastic for personalising messages on any of your baking and cake decorating projects. The letters are 6mm tall so could be inconspicuous if you want them to be! I found that a pair of nail clippers worked well to snap off the joining tabs between the letter and alphabet pieces. It'd be worthwhile doing this job in advance to add such a versatile piece to your sugar craft kit. Also remember to enter the words you desire back-to-front in the stamp for a mirror image on your cookies (or fondant).


Roll your dough out onto a well-floured board til it is 1cm thick. Dust generously. Cut out heart shapes with the cutter but leave in their cavities. The surrounding dough will support the shape when a message is punched into it.


Stamp messages one line at a time. I found it easiest to line my two index fingers up with the extremities of the message to make sure they were centralised on each cookie. Use a long spatula to transfer cookies easliy to a lined baking tray.

Another hint is if you do your batches in a logical order, you wont need to wash your bowl or mixing blade or spatula in between colours!! I recommend starting with 1.Yellow 2.Tangerine 3.Pink 4.Purple 5.Ice Blue 6.Bright Green.


Here are the individual combinations I made - there are some AMAZING flavours available!


THAT SMILE - Ice Blue colour Progel with Lemonade flavour LorAnn Oil


4 EVA - Tangerine colour Progel with Mango flavour LorAnn Oil


TWEET ME - Yellow colour Progel with Banana Creme flavour LorAnn Oil


YOU ROCK - Pink colour Progel with Cotton Candy flavour LorAnn Oil


LETS KISS - Bright Green colour Progel with Pistachio flavour LorAnn Oil (Kiwicakes girls fav!)


YES DEAR - Purple colour Progel with Pomegranate flavour LorAnn Oil


These lovely treats are perfect paired with flavoured milk. Ours is presented in a cute glass milk bottle with a matching retro pink paper straw.


You can go crazy with the messages you personalise! My advice is to keep them short and sweet. Here are some other ideas...

CUTE STUFF - IM IN LOVE - FRIEND FOREVER - CALL ME - DREAM - HOPE - PEACE - MY  MAN - WRITE ME - HI LOVE - ANGEL - CUTIE PIE - MY WIFE - MARRY ME - ITS LOVE - CALL HOME - BE TRUE - HOME SICK - SMILE - THANK YOU - TRUE LOVE - YOU & ME - UR A TIGER - ONE KISS - DARLING - FIRST KISS - PUPPY LOVE - DARLING - BE MINE - ONLY YOU - LOVE LETTER - CUTE - HINT HINT - FOR EVER - HUG ME - LOVE BIRD - MAGIC - DARLING - LOVE IS SWEET - CUP CAKE - DARE YA - LOVER BOY - SWEET TALK - I WONDER - SWING TIME - TWO HEARTS - SOUL MATE - FRIEND ME - TEXT ME - XOXO - CRAZY 4 U - EMAIL ME - IM YOURS - FRIENDS - BFF - TRUE LOVE. 

Sunday, February 9, 2014

Quick and easy delicious chocolate mousse - Poppy bakes


Poppy (age 10) recently made chocolate mousse for dessert when her Uncle returned from overseas, we held a welcome home dinner for him. She raided the garden for garnishes. I love how to kids it doesn't matter that there was only 1 strawberry and one blackberry to be found, so the rest got grapes.

Ingredients:
200grams dark chocolate (we used cadbury melting chocolate from the baking aisle)
30g butter
3 eggs separated
1 cup cream - whipped

Over a double boiler melt your chocolate. Once melted, remove bowl from double boiler and stir in butter. Allow to cool slightly. Stir in egg yolks.

Beat egg whites until soft peaks form. Gently fold half the egg whites and half the cream into the chocolate mixture. Repeat with the remaining halves.

Poppy put her mousse into a large piping bag for filling her small verrine glasses, to ensure they stayed  neat and tidy around the rims.

Allow to chill for at least three hours.


Thursday, February 6, 2014

Summer strawberries - chocolate dipped with chocolate transfer detail


Chocolate dipped strawberries can be transformed with the use of chocolate transfers. It's quick and easy to do. Chocolate dipped strawberries are a fond memory of Valentines Day for me. My now hubby presented me with a bowl of strawberries for Valentines day that he'd dipped himself way back in the 1990s when we first started dating. At the time I was suitably impressed that he'd taken the time to make something for me. I'm still impressed today when I'm given a home made gift, made with love.


Chocolate transfers elevate the simple chocolate dipped strawberry to a whole new level. Chocolate transfers come in a wide variety of colours and patterns, to suit every occasion. You can view our entire selection here.

Simply melt your chocolate over a double boiler, dip each strawberry and place down on your chocolate transfer sheet. Once cool, lift your strawberries away from the sheet and place on your serving dish (I do not refrigerate my strawberries, as this makes them ooze juice).


Any portion of unused transfer can be reused for your second round of dipping, simply place your next strawberry down on any patch of colourful transfer, avoiding the clear spaces, where the colour has been removed by the previous strawberry.

Tuesday, February 4, 2014

My favourite rose maker EVER is coming to Kiwicakes


Lisa Templeton is my favourite ever icing rose maker. I mean just look at the photos. I still look at them and think "that can't be real?"

I'm super excited to announce Lisa is coming to Kiwicakes to teach these wonderful roses Tuesday March 11th 2014 12 noon-5pm. Spaces are strictly limited and will be filled on a first come first paid basis. Cost for the 5 hour class is $100 per person.


Look how huge they are (there is a hand in some of the photos) Lisa tells me she'll bring a variety of dusts with her, so we can colour the roses any colour we wish.


For those of you that don't know Lisa, she owns and runs Denheath Desserts with her husband Donald. World famous for their custard squares. Lisa will be bringing afternoon tea for us all from Denheath, so we can keep our stamina up for this 5 hour rose making class. If you want to join us. Book online at www.bookwhen.com/kiwicakes

Chocolate Courgette Cupcakes - Poppy bakes


My daughter Poppy used anniversary day here in the north of NZ to make use of the many courgettes we have growing in the garden. Our kids won't eat courgettes, they declare loudly they don't like them. However they were heard to say "you can't even tell there's courgette in here" And they're right, unless you were told, you'd struggle to guess. The grated courgette adds a wonderful moistness to the cupcakes.

Ingredients
1 medium courgette aprx 120g (leave the skin on if they're spray free)
85g milk chocolate
2 Tbsp cocoa
2 eggs
50g brown sugar
90ml vegetable oil
120g flour
1/2 tsp baking powder
1/4 tsp baking soda
handful chopped walnuts

I've labelled this recipe with the tag "healthier option. It's a healthier option UNTIL you put the cream cheese icing on top. They make a great muffin, which kids will adore. With the addition of the icing, they're scrumptious.

Preheat oven to 180C. Line a cupcake pan with 12 liners. Grate the courgettes, discarding any liquid. Over a double boiler melt chocolate and allow to cool slightly.

Place the eggs, sugar and oil in a large bowl and whisk together. Sift in flour, baking powder, baking soda and cocoa. Stir gently until just mixed. Stir in courgettes and pecan nuts. Fold in melted chocolate. Spoon mixture in to cupcake liners. Bake 20 minutes.

Icing 
125g butter
250g block cream cheese
2 tsp vanilla
1/4 cup cocoa
3 1/2 cups icing sugar.

Cream together butter and cream cheese, add vanilla. Stir together cocoa and icing sugar, add 1 cup at a time, beating well with each addition. Ice cupcakes when cool.

Saturday, February 1, 2014

Strawberry pink champagne cupcakes


These cupcakes came about when I was tasked with making something for a cake guild meeting about "flavour profiles". I knew in advance what our demonstrator was making for the evening, so I tried to make something a little different to her flavours. The recipe formed and grew in my head as I was making them, and had a minor adjustment part way through.


To my regular vanilla cupcakes, I added two tablespoons of freeze dried strawberry powder. I baked them in the usual way, but the resulting cake was a little too subtle in flavour. Here's where they took a turn for the better: I decided to add a Strawberry creme  to the centre of each cupcake using Gobake Easy Frost and freeze dried strawberry powder. It's super easy, the recipe for creme is right there on the packet. Any unused portion can be stored in the fridge or frozen to make ice-cream like this. I used a Wilton bismark tip to fill the centre of the cupcakes (using Wilton's method, which you can see here).


To my buttercream icing recipe I added a few drops of Americolor pink gel paste colour and some Lorann champagne oil flavouring. It was piped with a simple 1m swirl (these cupcakes were all about the flavour not the decoration). We had a lot of items to taste test during our guild evening. These were a hit on the night and I will definitely be making them again.

Related Posts Plugin for WordPress, Blogger...