Friday, January 30, 2015

Valentines day - open heart cupcakes


These heart cupcakes started with an idea from Glorious Treats (although my method was a little different). They are quick and easy to make and something a little different to a fully frosted cupcake.


Take your favourite cupcake and using a heart cutter press gently down, this will cut a heart in to your cupcake. You then need to slide a knife under the heart to remove a shallow piece.


I coloured my buttercream icing with pink progel colouring. I fitted my piping bag with a bismarck tip to make it easy to fill the cavity.


I coloured my icing sugar pink using Rainbow Dust colour (please note I used an edible pink, I've inadvertently photographed the wrong pink and shown a craft dust here)


Shake the two together and the resulting icing sugar is pink, this is dusted over the surface of the cupcake.

Thursday, January 29, 2015

Pizza bases are quick and easy to make - and cheap too!


Last summer we installed a cheap and cheerful little concrete pizza oven. Our family has been having so much fun with it. With 2 little people in the house that could be considered picky eaters, individual pizzas are great as we can all choose what we want - and everyone is happy! Pizza bases aren't cheap to buy at the supermarket and let's be honest most of them taste terrible, I've likened many to cardboard!. The pizza bases I make just costs cents each to make and can be frozen, so you can make a big batch and pull them out as you need them. You can make individual sizes or larger ones - it's up to you.

Pizza bases recipe
1 1/4 Cups luke warm water.
1 tsp sugar
1 Tbsp dried yeast granules
1 Tbsp olive oil
1 tsp salt
3 Cups flour (either white or wholemeal, or a mix of the two)
1/2 tsp baking powder

In a stand mixer (mix by hand if you don't have one) place water, oil, sugar and yeast and leave for 5 minutes, I do this first and then get all of my other ingredients and bits and pieces organised by which time, the yeast mixture is activated and all frothy.

To this mixture add remaining ingredients and leave mixer fitted with dough hook running for 5-6 minutes. Leave to rise 5-10 minutes (I have left this step out when in a hurry and they've still work fine)


Your mixture should be nice and stretchy, remove from bowl. And give a quick knead by hand to knock back down.


For an 8'' pan, I take a piece of dough that fits in my hand a bit smaller than a tennis ball. I roll it out to fit the pan size.


Then I lightly dust my pan with flour


Drop the dough in to the pan and prick with a fork to dock the dough.


You can make thicker too if you're not a fan of thin bases


I par bake in an oven at 200C for aprx 5 mins - at this stage they can be kept aside for your pizza party or frozen for later use. Remember you don't need to fully bake them, as they'll be further cooked when your pizza bakes.


Sunday, January 25, 2015

A little glimpse in to the treasure trove of Kiwicakes - our wire selection


Here at Kiwicakes we've over 8000 products in stock, that's a huge number of items. I frequently hear "I didn't know you had these" I wanted to show you today just what an awesome selection of wire we have, everything from thick to thin, paper covered to metallic. You can find it here at Kiwicakes

Friday, January 23, 2015

Birthday pavlova for Grandma Kiwicakes


If you asked Grandma Kiwicakes what her all time favourite dessert was she'd say pavlova. Remember last year, I made the mini pavs with pineapple flowers. This year I decided to make a large one, as I never like to make something exactly the same way (there's too many new things to be trying to do that!)


Ingredients
6 egg whites
2 cups caster sugar (I like Chelsea)
1 heaped tablespoon of cornflour
1 Tbsp of vinegar, I use white, but malt works well too.
Vanilla essence (or other flavour you may refer)
4 Tablespoons cold water


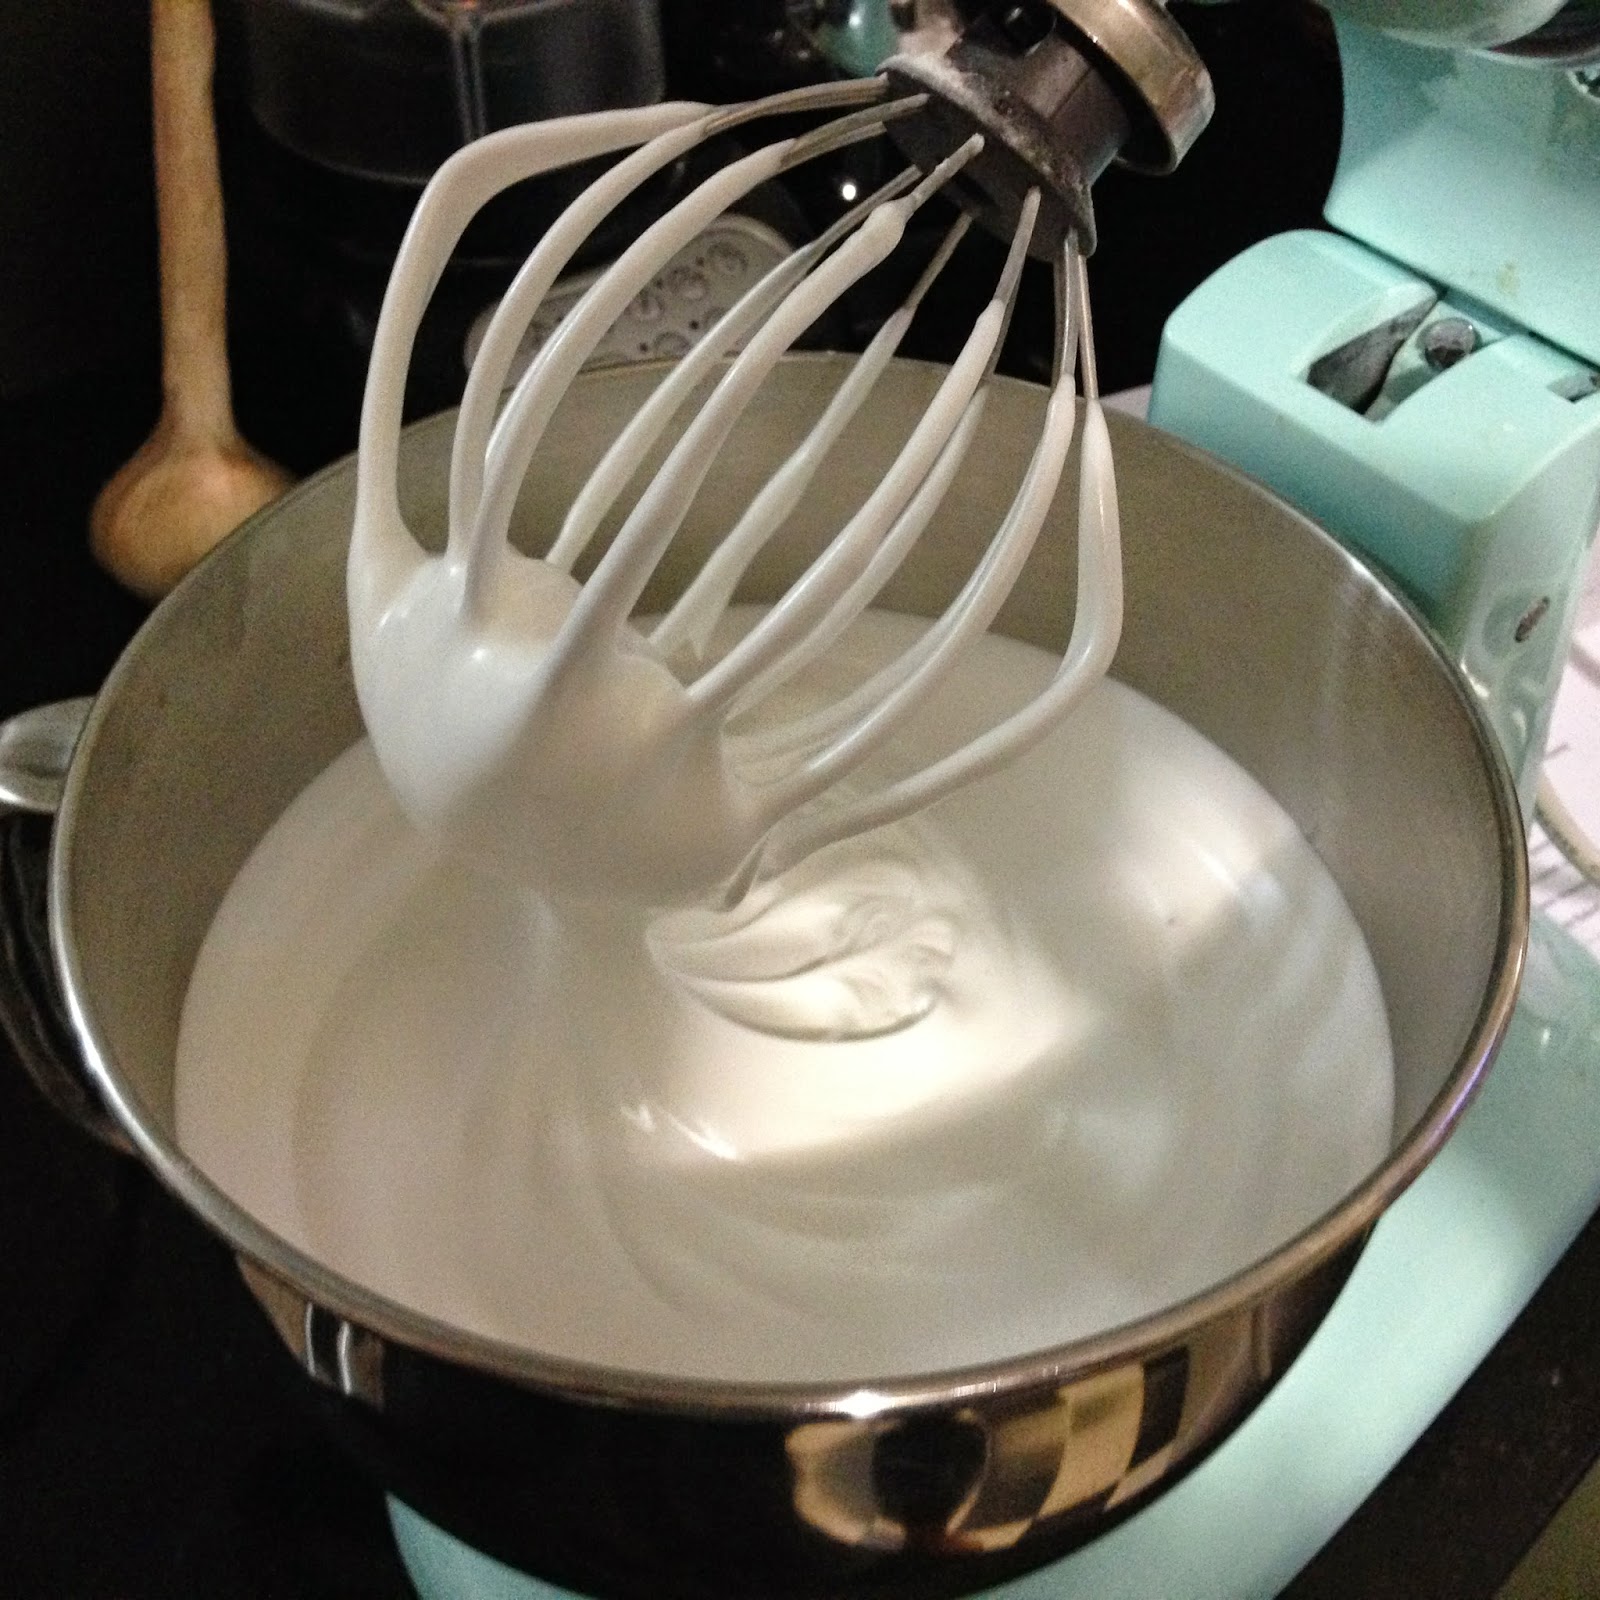
Preheat oven to 180C degrees. Place all ingredients in your stand cake mixer, turn on medium speed and leave to mix for 20 minutes. After 20 minutes, the mixture should have lovely stiff peaks, if your turn the mixer whisk upside down, the peaks should hold in place.


When you place your pavlovas in the oven, be careful not to slam the door, immediately drop your temperature down to 120C degrees. Bake for 3 hours, then leave in oven switched off until cool)


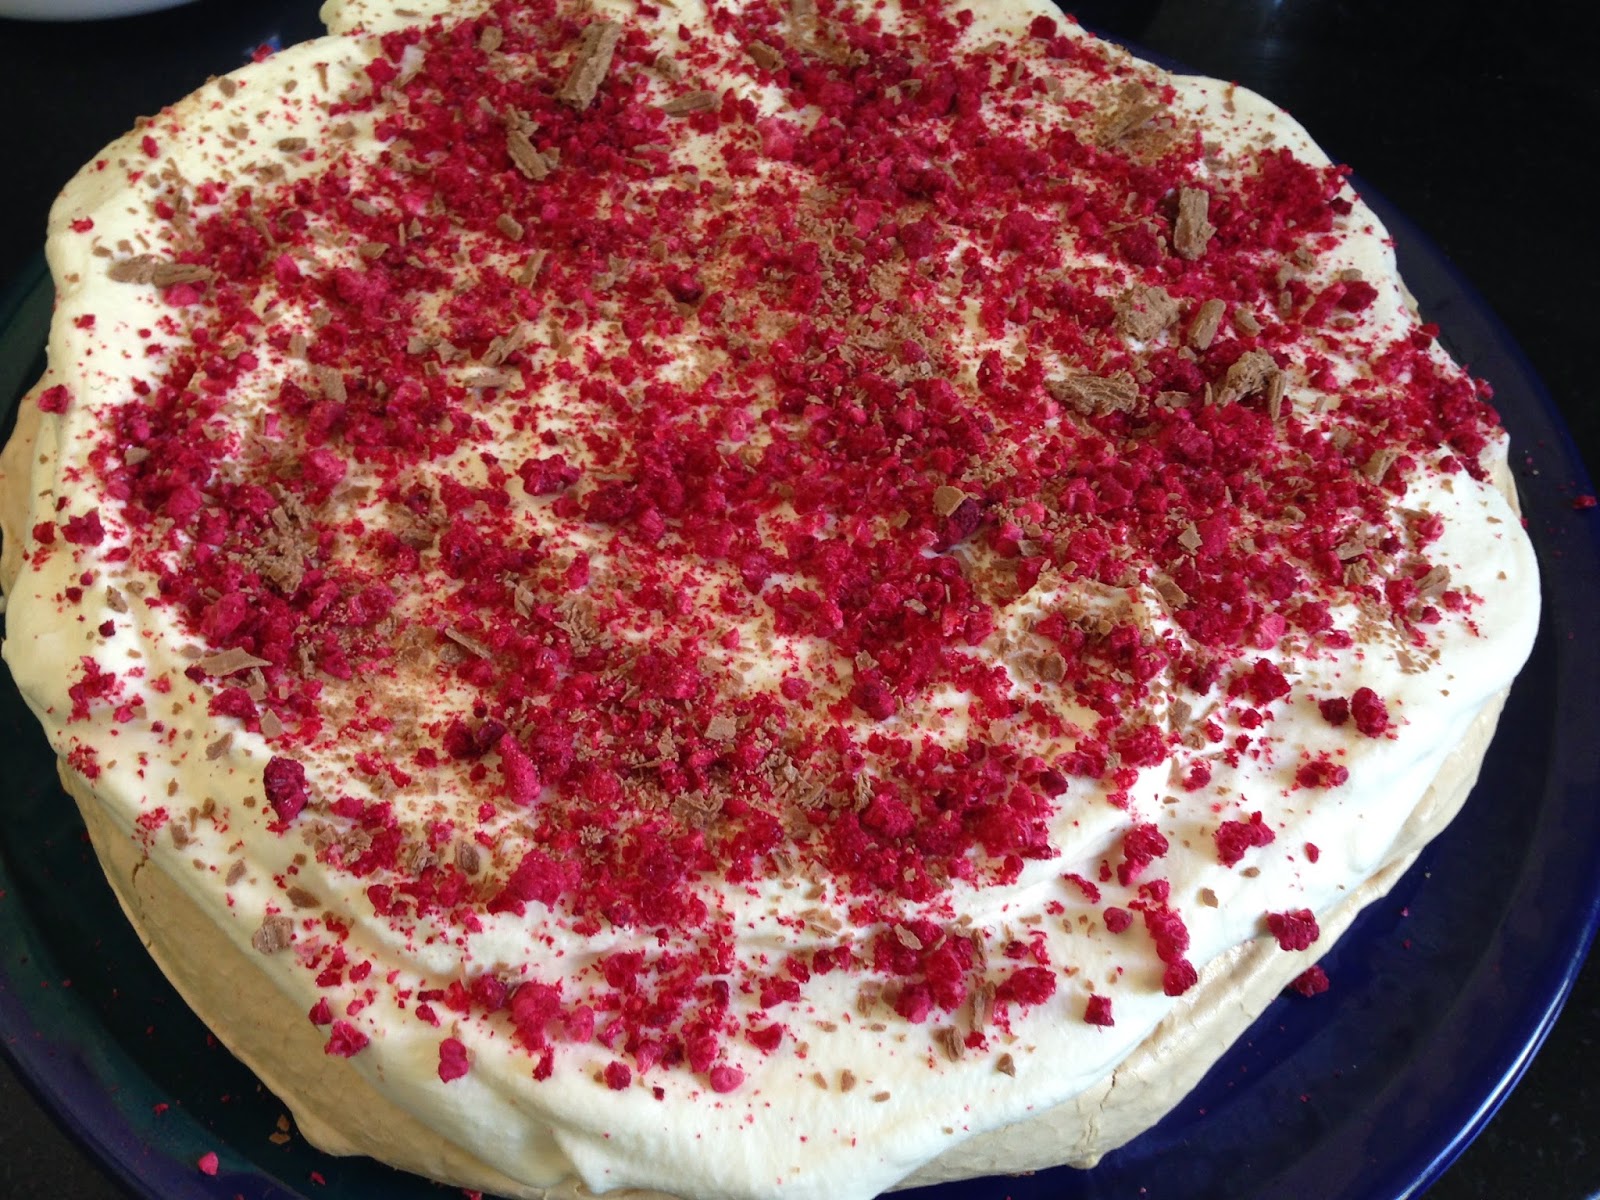
I took some Fresh-As Freeze dried raspberries and smashed them up a little to sprinkle across the top of the whipped cream. I always have a selection of Fresh-as freeze dried fruit in my cupboard, as times it can be darn near impossible, or really expensive to find fresh berries for sale in the supermarkets. (certainly the freeze dried raspberries are cheaper than fresh ones and the taste and quality is amazing). I also added a little flaked chocolate.


Thursday, January 22, 2015

Moustache Cake Pops - from Kiwicakes test kitchen


These Moustache or Mustache cake pops were displayed by Kiwicakes last year at the GoBake Cake Expo. We made both a glitter style with top hat and a plainer style with wafer paper ties.


Our cake pop balls were created with the round mould from this set. Dip your cake pop in chocolate or candy melts (if glittering your ball - darker chocolate works better, as it shows of the glitter to greater effect)


Using left over melted chocolate from dipping, adhere the little moustaches to your cake pop. Moustaches can be purchased here 


You can select any design of wafer paper you like. Simply cut out a diamond shape that is in keeping with the size of your cake pop to create a neck tie. This is adhered with a little melted chocolate.


Fun for young and old alike.


Tuesday, January 20, 2015

Button Cake - a quick and easy celebration cake


This button cake was easy and fun to make. I started with a selection of our buttons moulds and made rainbow coloured buttons using Satin Ice fondant to which I added a little tylose


I made the buttons one morning and used them later that afternoon. I used royal icing to adhere the buttons to the cake. I began by placing 2 large buttons for each colourway on to the cake, to create the wavy line the buttons follow, then filled in each colour from there. This was to ensure I had even graduation between the colours. This cake was displayed last year at the Go Bake Cake expo in Auckland.

This style of cake looks just as stunning with other shapes such as butterflies or flowers instead of buttons.

Love cake - with silver dragees


This LOVE cake was displayed by Kiwicakes last year at the GoBake Cake Expo and we've had it on display here at Kiwicakes for some time. I've often been asked how it was made....... SO here's how!. It's a 3 tier cake, covered in black Satin Ice fondant. The centre tier and the cake board edge are covered with diamante wrap (which you cut to required width with scissors). The love topper can be found here, we've quite a selection of different words in our diamante topper range here at Kiwicakes.


The edges where the two tiers meet were spread with black royal icing (just do a small section at a time, or the icing will set before you make it around the circumference) Over the top of the royal icing, a selection of our Greek dragees were applied. Over the top of this I sprinkled 2mm silver cachous to fill the little gaps. I used the Wilton Decorator Favourites pattern press set, to press in the patterns on the top & bottom tier, which I then piped with black royal icing and adhered dragees to. The black fondant drop tier border around the base of the cake was created with this mould.

This cake was very well received at the expo, it looks super complicated, but actually was very easy to produce.

Saturday, January 17, 2015

Tala - brand new nozzles will fit your old equipment!


Did you know brand new Tala icing nozzles purchased today will still fit an icing syringe from the 1920s. Tala has been making baking & decorating products since 1899. Their factory in England still produces many of the items in the way they've always been made. Which is great news if you've a set you're looking to expand or purchase replacements for. - see my short video

Thursday, January 15, 2015

Gumpaste - Vintage fabric look flowers


I often get asked how I made the white flower shown here on the ruffle cake above (The cake features on our current facebook Kiwicakes page cover.) It's very quick and simple to make.


You can take any three sizes from the FMM 5 petal rose cutters (there's 6 sizes in total to choose from) and a little gumpaste.


Roll your gumpaste out thinly, place on to fondant shaping foam, or foam pad  and using an XL ball tool gently rub around the edges to slightly ruffle.


Transfer to thicker foam and press down in centre to cup.


Transfer to flower forming cups (dust the cups with cornflour so they won't stick). allow a few hours for each layer to dry, before adhering the layers together using edible glue.


The 3 layer flower on my cake had a simple pink fondant button glued in the centre, however you can create any decorative centre you wish. My last photo (above), shows how more than 3 layers of petals can be used, to create a more full looking flower. The flower can be adhered to the side of the cake using royal icing or melted chocolate. It's reasonable heavy, so you need something substantial to glue it on with. Have fun!

Wednesday, January 14, 2015

Our Operation Sugar challenge


Thanks to Sarah &; Mike & the GoBake team we we were nominated for the "Operation Sugar pie in the face challenge" to fundraise for Operation Sugar Ltd.
And of course we were able to each make a nomination too. I nominated Ashley from Cuppacakes, Karina nominates Lisa Hansen from The Whole Cake & Caboodle and Laura nominates Kim Donker from Cake Tin Love.
Thanks to Ashley from Cuppacakes for making the cupcakes which were smashed in our faces - I could smell cream cheese frosting all day long, right in front of my nose!

Animal biscuits for our new pony Gingy


This gorgeous we pony joined our family Christmas eve. Her name is Gingy


One of the first things my daughter Poppy thought to bake over the holidays were pony treats for Gingy. And Gingy gobbled them up, she loved them.


It's a relatively simple recipe, they are very similar to human biscuits, just without the sugar really. The apple & carrot in them means they don't cut well with a cookie cutter, as we found out when we tried.

Ingredients
1 cup grated carrot
1 apple grated (any kind)
2 Tbsp vegetable oil
1/4 cup molasses
1 tsp salt
1 Cup Rolled oats
1 Cup flour

Preheat oven to 180C. Line a baking sheet with baking paper. In a bowl mix all ingredients together. Roll out dough as one large piece on baking sheet and cut in to 3cm squares using a pizza cutting wheel.The pieces may join together slightly during baking, but they can be snapped apart once cooled.
Bake 20 miutes. Cool before storing in an airtight container.


Tuesday, January 13, 2015

Seashells cake by Karina at Kiwicakes


This lovely cake was made by Karina here at Kiwicakes for her younger sisters 30th birthday. Rachael had asked for a fondant cake and said "chocolate", but other than this we were left to choose the design. I helped Karina start the shells, then she was off like a rocket, making trays and trays of lustred seashells using many of the seashell moulds we have here at Kiwicakes.


The cake is covered in ruffled Satin Ice chocolate fondant, this was applied to the cake in small sections, but as each one is overlaid over the last, you cannot see where one ends and another one begins. The shells were attached to the cake with royal icing. You can see a tutorial on how to colour our paua shells here.


Here's our gorgeous Rachael celebrating with her cake.


Monday, January 12, 2015

A special first birthday for Antonin - Poppy Bakes


This small cake was made by my daughter Poppy (11 years) for a family friend Antonin who was turning 1. The family is French/NZ and the wee character is Petit Ours Brun (little brown bear, from a french story book). Poppy was the one specifically asked to make his cake. She decided she wanted to make cupcakes as well. As Anotnin loves bananas, she decided to make a banana cake.


The cake was covered with a layer of Bakels white truffle, which I thought would be easier for Poppy than making ganache. I stepped in and leant a small hand to help her achieve a flat-ish finish. It was then covered in Satin Ice fondant. The little figure was modelled from Satin Ice fondant to which tylose had been added.


The cupcakes have small motifs on top that frequently appear in the story lines. The cupcakes are finished with easy frost  using a 1m tip


The little cake sat next to a cupcake stand at the birthday boys home. We used a simple cardboard cupcake stand, the way these cupcake stands fit together allows for a picture to be slotted in easily, it is held in place as a topper.


Both the cupcakes and the birthday cake we well received by Antonin, it was so much fun watching him eat birthday cake.


Sunday, January 11, 2015

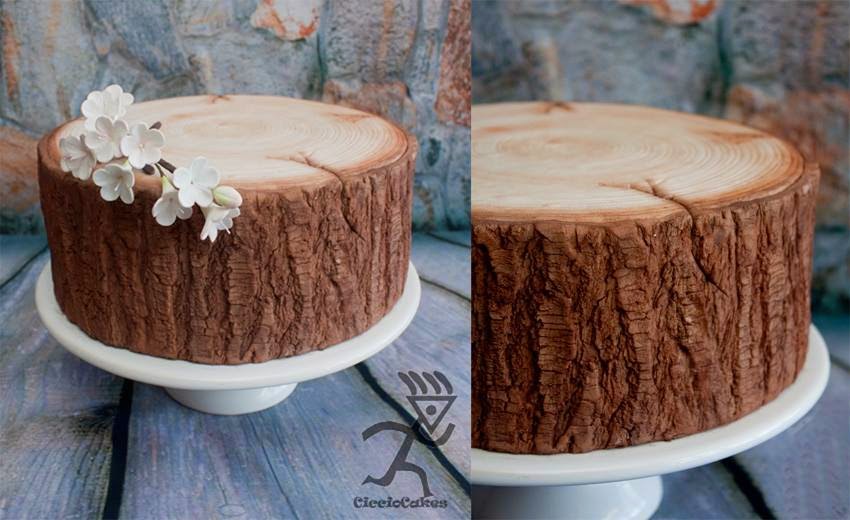
Woodgrain & tree trunk tutorials from Ciccio Cakes


The amazing Jo from Ciccio Cakes created two awesome tutorials recently, the one for the wood grain effect cake board above is FREE and you can find it here and is proudly sponsored by Kiwicakes.


This awesome tree trunk tutorial has an incredible number of photos and there's even video portions. You can purchase this tutorial here I've seen the tutorial and I was bowled over by the quality - you won't regret the $12NZ purchase price.

Saturday, January 10, 2015

Plants Vs Zombies cake for my wee friend Spencer


I get the pleasure of making my wee friend Spencer's cake each year, you may remember his 4th birthday cake I just came to the shock realisation he will shortly be 6, so I thought I'd best share his 5th birthday cake with you. I made Spencer a simple sheet cake. Which I covered in green Satin Ice fondant.


The I used a checkerboard stencil and dusted green lustre over the squares, to make the playing squares of the game.


I tore some areas of the fondant, and filled the holes with ground up oreo cookies (creme filling removed) to look like the holes the plants grow up out of.


The grass is piped with buttercream icing using tip 233


All of the plants, potatoes and zombies are made from Chocit brand chocolate modelling paste. I found this much easier to use than fondant for modelling such small pieces.


The no#5 candle is from Kiwicakes


The flower pot is made using this mould


The characters on this cake were a ton of fun to make, and in Chocit did not take long at all.

Related Posts Plugin for WordPress, Blogger...