Showing posts with label Wilton. Show all posts

Tuesday, May 5, 2020

No Baking staining on your cupcake papers with Wilton Colour cups


Today I baked our new white chocolate mud cake mix. I was curious to see if the white chocolate flavour came through. 
These bake low and slow (for cupcakes 30mins at 130c) not long after this photo was taken, I devoured this cupcake. I’m pleased to say I could smell and taste the white chocolate (I used 100g of Whittaker’s white chocolate) 
And a shout out to Wilton Colourcups!. I love these cupcake papers. They’re my all time go to, as they ALWAYS look this good after baking. Even at higher temps.


Rainbow coloured chocolate curls


These awesome curls were made by layering Wilton candy melts up in a plastic container (allow each one to cool before adding the next colour). Once set pop out your block - and curl away with your vege peeler 
This was part of a recent candy melt/chocolate demo at Kiwicakes


Wednesday, March 15, 2017

Coloured Easter chocolate bark from Kiwicakes


I decided to make some chocolate bark using our Easter Sprinkle Medley. I couldn't decided between properly moulded bars of free form so I decided to try both. I melted some Wilton candy melts and half I spooned in to a bar slab mould and the other half I spread on parchment paper. Then I simply sprinkled over the medley mix and allowed to cool before removing from the mould or breaking in to pieces.


Any remaining candy melts can be simply spread on parchment paper, allowed too cool


Then broken in to pieces for remelting another day


I then packaged in to clear cello bags. These were super yummy to eat, the crunch from the sugar pearls and non pareils made it very enjoyable to eat.


By changing the style of sprinkle medley this would also be a fun idea for unicorn and butterfly parties, or even parties for adults. Which style do you like best?


Monday, March 13, 2017

Easter Bunny Cake fun tutorial from Kiwicakes


This cake was so much fun to make, and it made everyone smile that saw it.


I wanted to be a little different and use a white bunny, which I dusted with Rainbow Dust Pearl Blush Pink. You simply brush it on dry and it sticks beautifully. 


The cake was 6'' in diameter and is over 6'' high. I sandwiched the two layers together with millionaires caramel and then used Bakels white truffle to coat the cake. I went for a semi-naked cake look. I then added Rainbow Dust Caribbean Blue dust to more white truffle and mixed to form this lovely blue shade for the drip effect. I popped it in to a piping bag, first piping a ring around the outside and allowing it to drip. Once set, I then filled in the centre (if you cover the top and allow it to drip, you get too wide drips and too much dripping)


Before the truffle set, I sprinkled some Easter Sprinkle Medley around the rim of the cake - placing by hand some of the larger elements from the medley.


I couldn't decide at first on the final placement for my Easter plaque. In then end I placed it on the board.


I used some speckled candy eggs from the store, as well as dusting some plain white eggs (you can make these using this mould) with Rainbow Dust irridescent lilac fusion dust.


The shards were made by spreading melted Wilton candy melts on to baking paper and allowing to cool, then breaking up using my hands. Don't fret about waste, as any left over can simply be broken up for remelting another day


I used a sharp knife to cut a slit in the cake, then pushed the candy melt shards down in to the slit. It was certainly a quick cake to make, and a very effective finish with the help of some wonderful lustre powders and sprinkles.


Friday, March 10, 2017

Rocky Road Easter Eggs - a fun tutorial from Kiwicakes


These rocky road Easter eggs were fun to make and so easy even children could make them with you.


I used gluten free mini marshmallows in assorted pastel colours, as small bag of blanched almonds a 3d cracked Easter egg mould  and coloured Wilton candy melts.


The finished product I stuck to coloured cake cards, which are inexpensive yet look so pretty.

.
The first step is to melt coloured candy melts in the microwave or on the stove top in a double boiler. I coated the inside of the mould using the back of a teaspoon. I hold it up to the light to look for any thin spots. Once satisfied I placed it int he fridge for ten minutes until cooled. 


Any left over candy melts can be spread on to parchment paper and cooled


They can then be broken up in to pieces for remelting another time


I used Malteser bunnies which I dusted with Rainbow Dust lustre dusts


Simply dust the powder dry over the chocolate, using a fluffy brush


To melted candy melts I added the marshmallows and blanched almonds


I placed a small amount of melted candy melts on to the cake card and placed the half egg on top to glue it in place. 


I spooned the rocky road mixture in to the egg half and pushed the bunny down in to the soft mixture. Over the top I sprinkled easter sprinkle medley


A Happy Easter Plaque finished him off.


Tuesday, January 20, 2015

Love cake - with silver dragees


This LOVE cake was displayed by Kiwicakes last year at the GoBake Cake Expo and we've had it on display here at Kiwicakes for some time. I've often been asked how it was made....... SO here's how!. It's a 3 tier cake, covered in black Satin Ice fondant. The centre tier and the cake board edge are covered with diamante wrap (which you cut to required width with scissors). The love topper can be found here, we've quite a selection of different words in our diamante topper range here at Kiwicakes.


The edges where the two tiers meet were spread with black royal icing (just do a small section at a time, or the icing will set before you make it around the circumference) Over the top of the royal icing, a selection of our Greek dragees were applied. Over the top of this I sprinkled 2mm silver cachous to fill the little gaps. I used the Wilton Decorator Favourites pattern press set, to press in the patterns on the top & bottom tier, which I then piped with black royal icing and adhered dragees to. The black fondant drop tier border around the base of the cake was created with this mould.

This cake was very well received at the expo, it looks super complicated, but actually was very easy to produce.

Tuesday, July 30, 2013

WIlton course 1 cakes from our students

Last night was the final night for my second group of ladies enrolled in the Wilton course 1 - 4 week class. Over my 2 groups of ladies, there has been many laughs, a few stamped feet and a barrel load of fun. Here's some of the finished cakes, from the final night.


I'm looking forward to Fondant & gumpaste with my ladies starting this Thursday afternoon. Watch our classes tab(above for new Wilton classes starting soon)

Tuesday, May 28, 2013

Wilton Method Instructor training in Sydney


Last week I attended training in Sydney to teach Wilton method classes here at Kiwicake's in Whangarei. It was an exhausting week - but we all had a blast. The classes are designed to teach to anyone at all, even someone who has never picked up a piping bag.


I arrived in Sydney on a sunny Sunday morning, as I strolled to the baggage carousel I heard "are you Sandra from Kiwicake's? " And it was Sharryn and Rachael from the Home Store in Milford. I had 2 new friends instantly! I had booked a car from the airport to our hotel and they jumped in with me and off we went. We arrived at the hotel too early for check in, so I suggested a trip to David Jones food hall in the CBD. Of course the girls said yes, so we jumped on a train and were there after a short ride. (check out the view above from my hotel room taking in Luna Park at middle left and the Sydney harbour bridge).


David Jones department store has a fond place in my memory, we always went there when our family travelled to Sydney. For Grandma Kiwicake's one of the first stops was always the food hall......... and now look at me!. It was just as I remembered it, bustling with people and bursting with exotic foods. I couldn't resist a photo of the candied fruits above.


Of course I spent a fair amount of time in the confectionery section. Every time I went to David Jones with my Granny, she used to buy me one of these chocolate parasols, I was surprised to see they still have them after all these years. (Of course I bought some to take home)


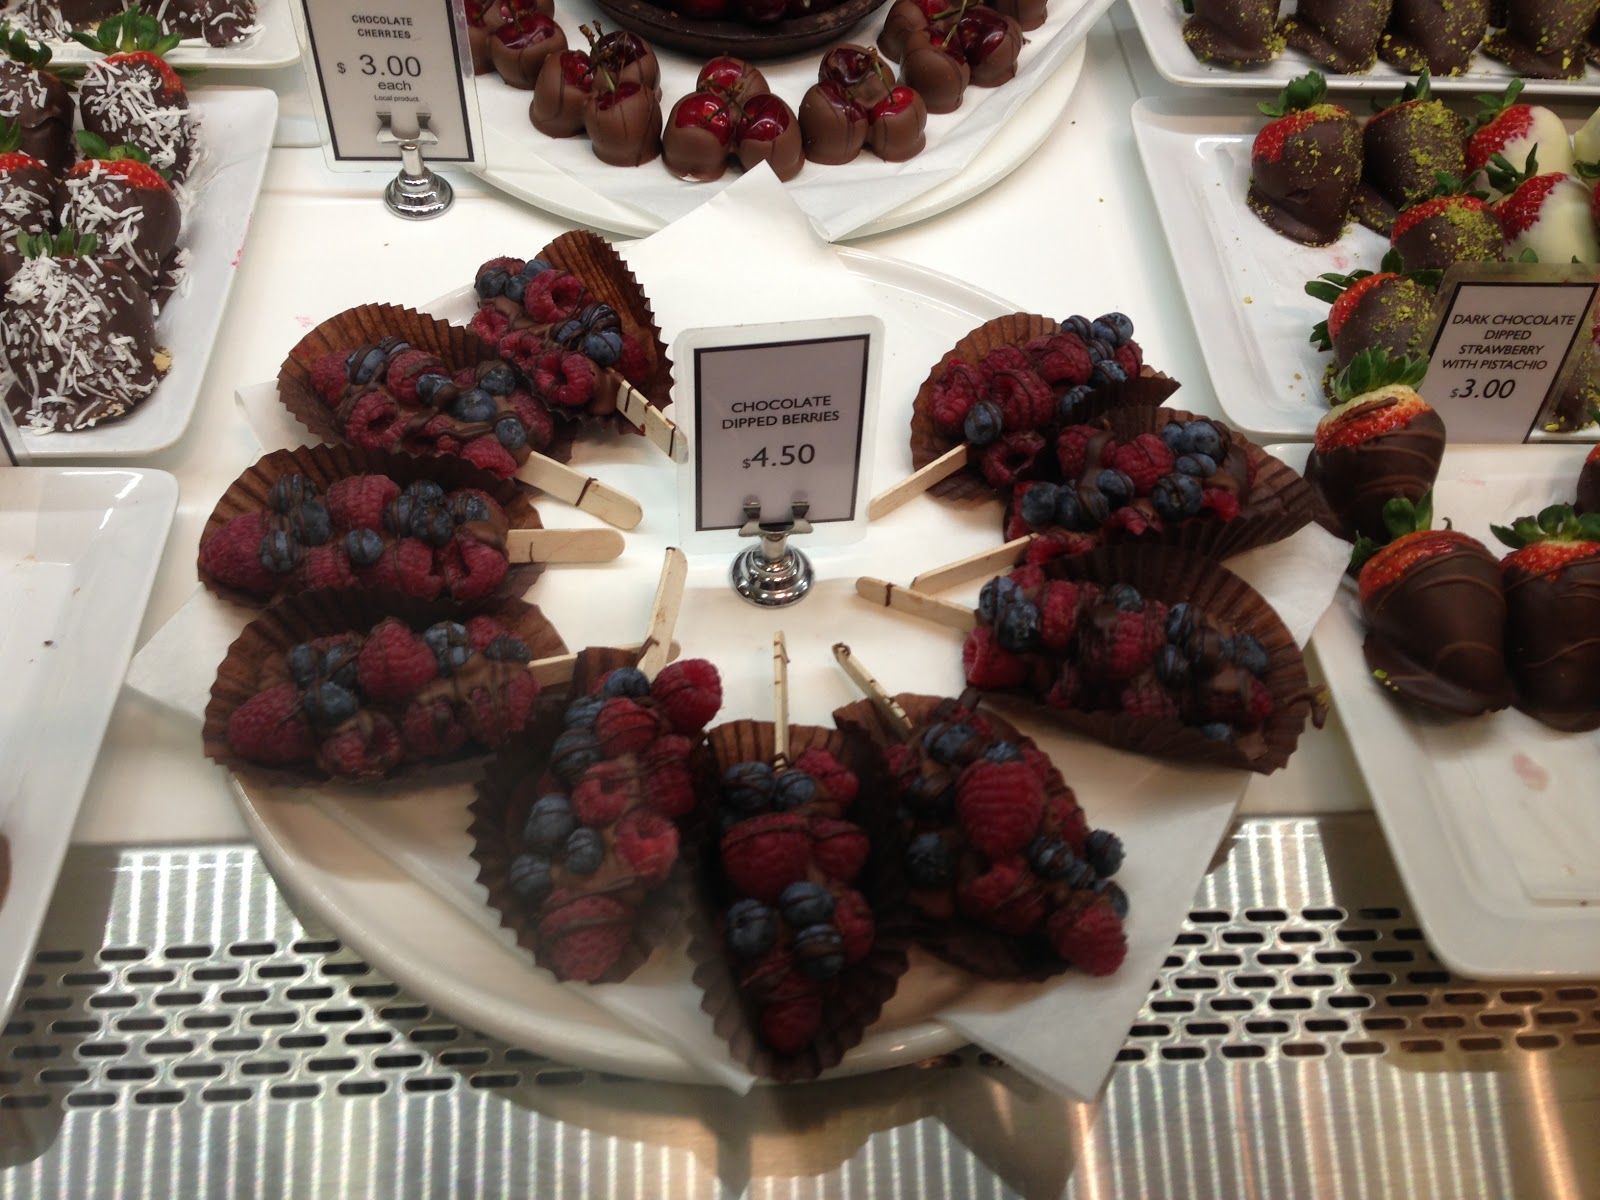
Sharryn, Rachael and I had lunch sitting at the cheese counter - it was amazing, we chose some cheeses, breads and antipasto and washed it down with a nice glass of wine. I couldn't not contemplate dessert, I was in David Jones food hall after all - these berry concoctions had taken my eye prior to lunch and as full as I was, they seemed just the thing to finish a nice lunch perfectly, along the back of the berries, was melted chocolate, which was essentially what held them in place once it set - it was delightfully refreshing.


On the way to the train station we passed this cupcake franchise in the mall, I couldn't resist a photo


Sunday afternoon we had orientation, that lasted until dinner time. And we were treated to a lovely dinner by our hosts. I often heard it said by many, that this week will be remembered as the week of food. Our hosts treated us to an amazing fully catered lunch every day, that far exceeded our expectations. With such a wide variety of choices, all served as a buffet in the hotel restaurant.


These 4 lovely ladies were our tutors for the week. There never ending patience and enthusiasm made a crazy week very pleasant.


That afternoon the lovely Cora (second from left in tutor photo said) "what do we all love to do?" "shopping!" was one answer. She continued with "shopping! - well you're going to need to do lots of shopping for the courses this week, only we don't take credit card, we don't take cash............... it's all free!" And it was, we had to traipse past many tables set up like these and take one (or sometimes two) of everything on the tables. It's just as well I took the second empty suitcase they recommended to take it all home with me. It was a fun process we were to repeat again during the course of the week.


Course 1 started with some buttercream piping on day one. A frantic and very MESSY day, that ran from 9.00am to 6.30pm


I was humbled when I was told I had the loveliest ribbon rose in the room.


We had stuff EVERYWHERE! - it was hard to keep your table space tidy


On Monday evening, the Milford girls and I strolled down Blues Point Rd in North Sydney, I was stunned by just how attractively (but not always expensively) the many eateries were decorated, this Thai restaurant we chose for dinner had these amazing lanterns (photo does not do them justice) outside. I could not help but think at home they may have been vandalised or stolen by now. We declared our meal some of the best Thai we'd ever eaten.


Day two was royal icing, a day many would like to forget, I quite enjoyed it, but it sure was messy! In the evening we were treated to an amazing dinner at the Kirribillie Club in North Sydney by our amazing hosts. This also happened to be Rachael's 21st birthday, so we were sure to show her a good time. We must have had too good a time, as I forgot to take any pictures.


Day three was gumpaste & fondant,


We still have stuff EVERYWHERE


Thursday night, we were treated to a night on Sydney Harbour with Sydney Showboat Cruises. We had a lovely dinner and drinks with a show on board. It lasted several hours - the view from the boat was amazing, as we travelled all over Sydney Harbour.


Me, Sharryn and Rachael just before we boarded the boat.


The lovely Rose & Rhonda


We managed to ensure Rachael was called up on stage by the MC to celebrate her 21st birthday


One the final day, as part of the course work we had to cover a cake (normally a student would have 2 weeks to plan their final cake, we had less than 1 hour) 


Many of my fellow students, used the large fondant bow from course three - or placed all of their icing flowers on their cakes, that they had made during the week, essentially meaning they only needed to place the items and they were done. I didn't make life easy for myself and decided I'd do some ruffling. But I managed to knock it all out in 30 minutes, so I was pretty pleased with the end result. More than likely because this cake below is nothing like anything I would ever make, as I don't usually go for girly styles.


My partner in crime for the week Sarah Eduati from "The Cake Stop"


You can see me in this photo, but you'll have to look very hard.


Our course ended on Friday evening with a small graduation ceremony. YAY! we all passed. All 42 of us are now trained Wilton method instructors. We finished with drinks and canapes in the bar. I made so many wonderful new friends during this time away. Fiona who had sat behind me for the week invited those of us left in Sydney on Friday evening for dinner at down at The Rocks at a wonderful German restaurant. She had a wonderful evening planned for us, we caught the ferry to Circular Quay and walked a short distance to our dinner. I couldn't resist taking a photo of Luna Park lit up at night, as our ferry left from right outside.

Friday evening I crawled in to bed just before midnight, and flew home to NZ on Saturday morning. I am thankful for my new found appreciation for teaching, my wonderful new friends and for my amazing week away. You'll see details of the Wilton classes I'll be teaching appear in the CLASSES tab (above under the Kiwicake's blog banner) over the next week or so.
Related Posts Plugin for WordPress, Blogger...